How To Install an Outdoor Pole Light
Installing an outdoor pole light enhances security and aesthetics, providing illumination for walkways, driveways, and landscapes. This guide outlines the necessary steps for a safe and successful installation. Always consult local building codes and regulations before commencing any electrical work.
Planning and Preparation: Careful planning is crucial. Begin by determining the ideal location for the pole light, considering factors like proximity to power sources, intended illumination area, and any potential obstructions. Mark the desired location clearly.
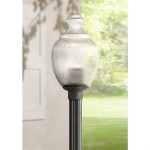
Gathering Necessary Materials and Tools: Assemble all required materials and tools before starting the installation. This includes the pole light kit (pole, fixture, mounting hardware), a post-hole digger or auger, concrete mix, gravel, a level, measuring tape, safety glasses, work gloves, wire strippers/cutters, electrical tape, a voltage tester, and appropriate wiring (gauge determined by the fixture's wattage). A grounding rod and grounding wire are also essential for safety.
Digging the Post Hole: The hole's depth and diameter should adhere to the manufacturer's instructions and local building codes. Generally, the hole should be deep enough to provide adequate stability for the pole, typically one-sixth to one-fourth of the pole's above-ground height. The diameter should allow for several inches of gravel and concrete around the pole's base. After digging, add a layer of gravel to the bottom of the hole for drainage.
Setting the Pole: Place the pole in the center of the hole, ensuring it is perfectly plumb using a level. Temporarily brace the pole in position using wooden stakes and ropes. Double-check the vertical alignment before proceeding.
Pouring the Concrete: Mix the concrete according to the manufacturer's directions. Pour the concrete into the hole, ensuring it completely surrounds the pole's base and fills the hole to a few inches below ground level. Allow the concrete to cure completely according to the manufacturer's recommended curing time. This typically takes several days.
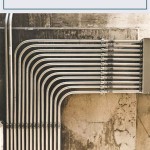
Electrical Connections (Before Mounting the Fixture): Once the concrete has cured, it's time to make the electrical connections. First, turn off the power to the circuit at the main breaker box. Run the appropriate electrical wiring from the power source to the base of the pole. Use conduit if required by local codes. Leave sufficient wire extending from the top of the pole for connecting to the fixture.
Grounding the Pole: Proper grounding is essential for safety. Drive a grounding rod into the earth near the pole's base. Connect a grounding wire from the grounding rod to the designated grounding point on the pole or within the electrical junction box at the pole's base. This creates a safe path for electrical current in case of a fault.
Mounting the Fixture: Carefully follow the manufacturer's instructions for mounting the fixture to the pole. This typically involves securing the fixture with screws and connecting the wires from the fixture to the wires extending from the pole. Use wire connectors and electrical tape to ensure secure and weatherproof connections. Be sure all electrical connections are made inside a weatherproof junction box within the fixture or pole.
Final Electrical Connections and Testing: After mounting the fixture and making all connections, carefully inspect all wiring and connections for security and proper insulation. Once confirmed, turn the power back on at the breaker box. Test the light fixture to ensure it is functioning correctly. If any issues arise, immediately turn off the power and troubleshoot the connections.
Finishing Touches: After successful installation and testing, add any finishing touches, such as caulking around the base of the pole where it meets the concrete to prevent water intrusion. Dispose of any excess materials responsibly. Regularly inspect the pole light for any signs of damage or wear and tear.
Safety Precautions: Working with electricity carries inherent risks. Always prioritize safety. Ensure the power is off at the breaker box before making any electrical connections. Use insulated tools and wear appropriate safety gear, including safety glasses and gloves. If unsure about any aspect of the installation, consult a qualified electrician.
Alternative Installation Methods: Depending on the specific pole light kit and location, some installations may utilize different methods, such as direct burial for poles without a concrete base or surface mounting on existing structures. Always follow the manufacturer’s instructions specific to the chosen pole light kit.
Maintenance: Regular maintenance is essential for optimal performance and longevity. Periodically clean the fixture to remove dirt and debris that can obstruct light output. Inspect the wiring and connections for any signs of damage or corrosion. Replace any damaged components promptly. Ensure the pole remains securely anchored and plumb.

How To Install A Yard Light Post Electrical Projects Home Wiring Lights

How To Install Outdoor Lamp Post Easily Step By Gui

How To Install An Outdoor Lamp Post Backyard Water Garden

Step By Guide In Installing An Outdoor Post Lamp

How To Update Or Replace A Lamp Post And Light

How To Install A Lamp Post Great Diy Project

How To Install Outdoor Lighting And Diy Family Handyman

How To Install An Outdoor Lamp Post Doityourself Com

How To Replace A Lamp Post Light Fixture Diy Quick And Easy

How To Install A Lamp Post The Home Depot
