How to Install Outdoor Motion Lights
Outdoor motion lights provide security and convenience by illuminating your property when motion is detected. Installing them is a relatively straightforward DIY project, and the process typically involves a few key steps. This comprehensive guide will walk you through everything you need to know to successfully install your new outdoor motion lights.
1. Planning and Preparation: Assessing the Situation
Before embarking on the installation, it's crucial to plan and prepare thoroughly. The first step is to determine the location and type of motion light that best suits your needs. Consider factors like the size of the area to be illuminated, the desired light intensity, and any existing electrical outlets or wiring.
Factors to consider during planning include:
- Desired coverage area: Decide how much of your property you want the light to illuminate. This will inform the type of light fixture and its placement.
- Light intensity: Determine the appropriate lumens for your needs. High lumens are suitable for large areas, while lower lumens may suffice for smaller spaces.
- Power source: Determine if you have an existing electrical outlet nearby or if you need to run new wiring. If new wiring is required, it's essential to refer to local electrical codes for proper execution.
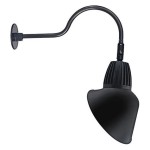
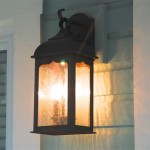
- Light fixture style: Select a fixture that complements your home's style and provides the desired aesthetics.
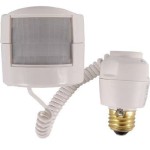
- Motion sensor range and sensitivity: Choose a sensor with a range and sensitivity that aligns with your security requirements.
Once you've chosen your motion light, gather the necessary tools and materials. This includes::
- Screwdrivers (Phillips and flathead): For mounting the fixture and electrical connections.
- Wire strippers: For exposing wire ends for connections.
- Wire connectors (wire nuts): For securing wire connections.
- Voltage tester: To confirm power is off before working on wiring.
- Ladder (if needed): To reach the mounting location.
- Safety glasses and gloves: To protect yourself during installation.
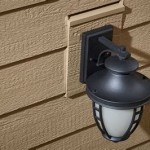
2. Mounting the Fixture: Securing the Light
The next step is mounting the motion light fixture. This typically involves drilling holes for mounting screws, ensuring the fixture is level, and securing it to the wall or post. Always refer to the manufacturer's instructions for specific mounting details.
The mounting process usually involves these steps::
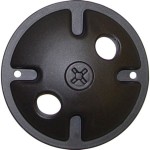
- Mark the mounting location: Use a pencil to mark the desired spot on the wall or post where you want the fixture mounted.
- Drill pilot holes: Drill pilot holes at the marked spots to guide the screws and prevent wood from splitting.
- Mount the fixture: Align the fixture with the marked spot, making sure it's level. Insert and tighten the screws to secure the fixture.
- Check for stability: Gently tug on the fixture to ensure it is securely mounted.
3. Wiring the Light: Establishing the Connection
Once the fixture is mounted, you'll need to connect the wires. This step requires careful attention to ensure proper and safe connections. Always turn off the power to the circuit before working on any electrical wiring.
Follow these steps when making wiring connections:
- Identify the wires: Locate the black, white, and ground wires from the fixture and the wires from the electrical outlet or junction box. Common wire colors are black (hot), white (neutral), and green or bare copper (ground).
- Strip the wire ends: Use wire strippers to expose a small amount of wire on each end for connection.
- Connect the wires: Twist together the corresponding wires (black to black, white to white, and ground to ground) using wire nuts. Ensure each wire connection is secure and properly insulated.
- Secure the wires: Tuck the wire connections neatly within the junction box or fixture. The wires should be free from tension or strain.
- Turn on the power: Carefully restore power to the circuit and test the motion light. If the light doesn't work, double-check the wire connections for any errors.
After successfully installing your outdoor motion lights, don't forget to test both the fixture and the motion sensor to ensure their functionality. Adjust the sensor's sensitivity and range to accommodate your desired detection levels. Finally, note the location of the circuit breaker controlling the motion light for easy access during future maintenance or troubleshooting.

How To Install An Outdoor Motion Sensor Light With Pictures

How To Install An Outdoor Motion Sensor Light With Pictures

How To Install Outdoor Motion Activated Lights Tomcomknowshow

How To Install Outdoor Motion Lights

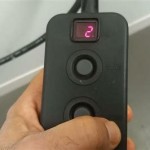
Installing A Remote Motion Detector For Lighting Diy

How To Make A Motion Sensor Light Stay On Rayzeek

4 Tips For Outdoor Security Lighting Haas Sons

Zenith Motion Sensor Wiring Diagram Outside Lights To Handyman Wire Home Electrical

Motion Sensor Wiring Diagram Lights Outdoor

How To Replace A Porch Light With Security Dummies
Related Posts