How to Install an Outdoor Low Voltage Transformer
Outdoor low voltage transformers are essential for powering landscape lighting, pond pumps, and other outdoor electrical devices. Proper installation ensures safety and optimal performance of these systems. This guide provides a step-by-step approach to installing a low voltage transformer outdoors.
Planning and Preparation
Before beginning the installation, taking the time to plan and prepare properly is crucial. This initial phase helps prevent issues during the installation process and ensures the system functions correctly.
- Determine Power Requirements: Calculate the total wattage of all devices to be connected to the transformer. This information determines the appropriate transformer size.
- Choose the Right Location: Select a location that is dry, well-ventilated, and protected from the elements. The location should also be close to a GFCI-protected outdoor electrical outlet.
- Gather Necessary Tools and Materials: Assemble all required tools, including wire strippers, a voltage tester, electrical tape, wire connectors, and mounting hardware. Be sure to have the correct gauge wire for the load and distance to the fixtures.
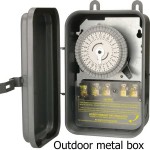
Mounting the Transformer
Secure mounting of the transformer is essential for safety and stability. Different transformers may have specific mounting instructions, so always refer to the manufacturer's guidelines.
- Secure Mounting Plate: If a mounting plate is included, attach it securely to a wall or post using appropriate screws and anchors. Ensure the surface is flat and can support the weight of the transformer.
- Attach Transformer to Mounting Plate: Carefully mount the transformer onto the mounting plate, ensuring it is firmly in place. Use provided screws and follow the manufacturer’s instructions precisely.
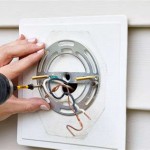
Wiring the Transformer
Proper wiring is critical for the safety and functionality of the low voltage system. Following these steps will ensure the connections are secure and correct.
- Turn off Power: Before working with any electrical wiring, ensure the power to the GFCI outlet is turned off at the breaker box. Use a voltage tester to double-check that the power is off.
- Connect Input Wires: Connect the input wires from the transformer to the GFCI outlet. Typically, black connects to "hot," white connects to "neutral," and green connects to "ground." Securely tighten the wire connections.
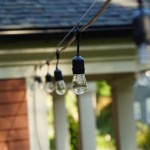
- Connect Output Wires: Connect the low voltage output wires from the transformer to the landscape lighting wires. Match the polarity of the wires, typically by connecting matching wire colors. Secure the connections with wire connectors and electrical tape.
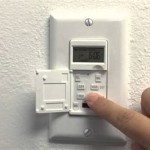
Testing and Finalization
After the wiring is complete, thorough testing and final checks are essential to ensure the system is operating safely and correctly.
- Turn on Power: Turn the power back on at the breaker box and then switch on the GFCI outlet.
- Test the Lights: Check that all connected lights are functioning properly. If any lights are not working, double-check the wiring connections.
- Verify Voltage Output: Use a voltage tester to ensure the transformer is outputting the correct low voltage.
Troubleshooting
Troubleshooting common issues can help resolve any problems that arise during or after installation.
- No Power: Check the breaker and GFCI outlet. Ensure the connections to the transformer's input wires are secure.
- Lights Flickering: This could indicate a loose wire connection or an overloaded circuit. Check all wire connections and verify the total wattage of the connected lights is within the transformer's capacity.
- Tripped GFCI: This suggests a ground fault. Inspect the wiring for any damage or exposed wires and ensure all connections are dry.
Safety Precautions
Safety should be the top priority when working with electricity. Adhering to safety guidelines is crucial to prevent accidents and injuries.
- Always Disconnect Power: Before working on any electrical connections, always disconnect the power at the breaker box.
- Use Proper Tools: Utilize appropriate tools, such as insulated screwdrivers and wire strippers, for electrical work.
- Grounding: Ensure proper grounding of the transformer and all connected devices to prevent electrical shock.
Maintenance
Regular maintenance helps ensure the longevity and continued safe operation of the low voltage system.
- Periodic Inspection: Regularly inspect the transformer and wiring for any signs of damage or wear.
- Clean Debris: Keep the area around the transformer free of debris, leaves, and other obstructions to ensure proper ventilation.
- Check Connections: Periodically check the wire connections to ensure they remain tight and secure.

How To Wire Outdoor Low Voltage Lighting Part 3

The Easiest Way To Install Low Voltage Landscape Lighting Abby Organizes

How To Install A Dewenwils Low Voltage Transformer And 12 Volt Landscape Spotlights

How To Install Low Voltage Outdoor Landscape Lighting The Garden Glove

How To Wire Outdoor Low Voltage Lighting Part 3

Wiring Installation Coastal Source

Outdoor Low Voltage Lighting Diy Family Handyman

The Easiest Way To Install Low Voltage Landscape Lighting Abby Organizes

Landscape Lighting Replace A Transformer

Where Do I Get Power For The Transformer Low Voltage Outdoor Landscape Lighting
Related Posts