How to Install Outdoor Lights on House
Outdoor lighting can dramatically enhance the curb appeal and security of your home. Whether you're illuminating a walkway, highlighting architectural features, or creating a cozy outdoor living space, installing outdoor lights is a rewarding project that can be tackled with the right tools and a little bit of know-how. Here's a comprehensive guide to help you get started.
Planning and Preparation
Before you start installing lights, it's crucial to plan your lighting scheme and gather the necessary materials. Consider the following factors:
- Lighting Type: Choose between floodlights, spotlights, path lights, wall sconces, or pendant lights based on your specific needs and aesthetic preferences.
- Power Source: Decide whether to use hardwired or battery-operated lights. Hardwired lights provide reliable illumination but require professional installation, while battery-operated lights offer greater flexibility but may require regular battery replacement.
- Placement: Plan the placement of lights to illuminate walkways, highlight architectural features, and create a welcoming atmosphere. Consider the angles and spacing of lights for optimal illumination and minimal glare. li>Materials: Gather necessary materials such as junction boxes, mounting brackets, electrical wires, and weather-resistant outdoor lighting fixtures.
Installation Steps
Once you have planned and prepared, follow these steps to install outdoor lights safely and effectively:
- Turn Off Power: Ensure safety by turning off the power to the circuit you'll be working on at the breaker panel.
- Install Junction Boxes: Install junction boxes at each light fixture location to provide a safe and weatherproof connection point for wires.
- Run Electrical Wires: Connect electrical wires from the junction boxes to the light fixtures, ensuring they are properly secured and protected against weather exposure.
- Mount Light Fixtures: Position the light fixtures on the mounting brackets and securely fasten them in place. li>Wire Light Fixtures: Connect the electrical wires to the light fixtures, following the manufacturer's instructions and ensuring proper polarity (matching black to black, white to white, and green or bare copper to ground).
- Restore Power: Turn the power back on at the breaker panel and test each light fixture to ensure it's functioning correctly.
Additional Tips
To ensure a successful outdoor lighting installation and long-lasting performance, keep these tips in mind:
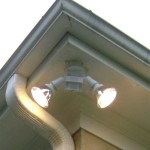
- Consider Security: Place motion-activated lights near entrances and vulnerable areas to deter trespassers.
- Use Energy-Efficient Bulbs: Opt for energy-efficient bulbs like LEDs to save energy and reduce maintenance costs.
- Control the Glare: Direct lights downwards to minimize glare and light pollution, especially for neighbors.
- Hire a Professional Electrician: If you're not comfortable working with electricity, don't hesitate to consult a licensed electrician for assistance.
Conclusion
Installing outdoor lights can enhance the safety, ambiance, and curb appeal of your home. By following the steps outlined above and adhering to essential tips, you can create a beautiful and functional outdoor lighting scheme that will elevate the aesthetics and security of your property.

How To Install Your Own Outdoor Backyard Lighting My 100 Year Old Home

How To Hang Outdoor Lights Tips For Installing Holiday Lighting

Step By Guide Installing Outdoor Lighting Around Your Home Govee

How To Hang Outdoor String Lights And Make Them Look Good Wirecutter

How To Hang Lights On Your Home Balsam Hill

How To Hang Outdoor String Lights The Home Depot

Led Security Lights The Ultimate Guide To Home Safety

How To Install Outdoor Lights

Tips For Installing Outdoor Lighting Riverfront Estates

How To Install Outdoor Floodlights True Value
Related Posts
