How To Install An Outdoor Light Fixture On Vinyl Siding
Installing an outdoor light fixture on vinyl siding requires careful planning and execution to ensure a weathertight seal and prevent damage to the siding. This guide provides a comprehensive overview of the process.
Tools and Materials: Before beginning the installation, gather the necessary tools and materials. These include a voltage tester, wire strippers, electrical tape, a drill with appropriate drill bits (including a hole saw for larger fixtures), a level, screwdriver, measuring tape, safety glasses, work gloves, exterior-grade caulk, mounting block designed for vinyl siding, the outdoor light fixture itself, and appropriate wiring (gauge and type depending on the fixture). Having everything readily available will streamline the installation process.
Safety Precautions: Working with electricity always presents potential hazards. Before starting any electrical work, turn off the power to the circuit at the breaker box. Using a voltage tester, double-check that the power is indeed off at the wires you will be working with. Wearing safety glasses and gloves is crucial to protect against potential injuries.
Choosing the Location: The location of the light fixture is crucial for both aesthetic and functional purposes. Consider the desired lighting effect and the fixture's intended purpose (security, ambiance, etc.). Avoid placing fixtures too close to windows or doors where the light might be intrusive. Check for any obstructions behind the siding, such as pipes or wiring, before drilling. Local building codes may also dictate minimum clearances from the ground and other structures.
Preparing the Mounting Surface: Vinyl siding expands and contracts with temperature fluctuations. Therefore, directly mounting a light fixture to the siding is not recommended. Instead, a mounting block specifically designed for use with vinyl siding should be utilized. These blocks allow the siding to move freely without affecting the fixture. The mounting block should be positioned at the desired location and leveled. Mark the mounting holes on the siding through the block's pre-drilled holes.
Installing the Mounting Block: Using the marked locations as a guide, carefully drill pilot holes through the siding. The size of the pilot holes should be slightly smaller than the diameter of the mounting screws. Insert the mounting screws through the block and into the siding. Tighten the screws firmly, but avoid over-tightening, which could damage the siding. Ensure the block remains level throughout the process.
Wiring the Fixture: With the mounting block securely in place, the wiring can be connected. Follow the manufacturer's instructions for wiring the specific fixture. Typically, this involves connecting the black wire from the fixture to the black (hot) wire from the power source, the white wire from the fixture to the white (neutral) wire from the power source, and the green or bare copper wire from the fixture to the green or bare copper (ground) wire from the power source, and to the mounting block itself (if it has a grounding screw). Secure all wire connections with wire nuts and wrap them with electrical tape for added protection.
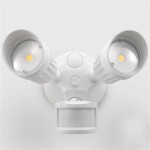
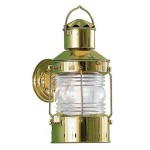
Mounting the Fixture: Once the wiring is complete, carefully attach the fixture to the mounting block. The specific method will vary depending on the fixture's design, but typically involves screws or bolts. Follow the manufacturer's instructions carefully. Ensure the fixture is securely attached and level.
Sealing the Fixture: Proper sealing is essential to prevent water intrusion and protect the electrical connections. Apply a bead of exterior-grade caulk around the perimeter of the fixture where it meets the siding. This will create a weathertight seal. Smooth the caulk with a wet finger or caulking tool for a neat finish. Allow the caulk to dry completely before exposing it to moisture.
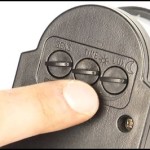
Testing the Fixture: After the caulk has dried, turn the power back on at the breaker box. Test the fixture to ensure it is working correctly. If the light does not turn on, double-check the wiring connections and ensure the bulb is properly installed.
Final Inspection: Once the fixture is operational, conduct a final inspection. Check for any gaps or areas where water could potentially penetrate. Ensure all screws are tight and the fixture is secure. If any issues are identified, address them promptly to prevent future problems.
Installing an outdoor light fixture on vinyl siding can be a manageable DIY project with proper preparation and execution. Adhering to these guidelines and following the manufacturer’s instructions specific to the fixture will result in a safe and functional installation.

How To Add A Light Fixture Vinyl Siding Electrical Box Aka J Block

Vinyl Siding Lights How To Mount Using A Mounting Block Diy

New House Siding How Do I Install Outdoor Lights On This Bracket Doityourself Com Community Forums

Exterior Light Installation On Vinyl Siding Block

How To Install An Exterior Light Fixture On Vinyl Siding

How To Install A Mounting Block On Existing Vinyl Siding Step By Tutorial

How To Install Outdoor Light Fixtures On A Surface Mounting Block

Vinyl Siding Blocks For Exterior Lights Page 2 Electrician Talk

Replacing An Outdoor Light Fixture

How To Install An Outdoor Light Fixture The Right Way
Related Posts