How to Install Outdoor LED Flood Lights: A Comprehensive Guide
Upgrading your outdoor lighting with LED flood lights is an excellent way to enhance security, illuminate dark areas, and create a welcoming ambiance. Installing outdoor LED flood lights is a relatively straightforward process that can be completed in a few simple steps. This guide will walk you through each step, ensuring a successful and safe installation.
Planning and Preparation
Before starting the installation, it's crucial to plan and prepare the necessary materials and tools. Ensure you have the following:
- LED flood light(s)
- Mounting bracket
- Screws and bolts
- Electrical wires
- Electrical tape
- Wire strippers
- Screwdriver
- Drill (if necessary)
Before starting the installation, consider the following:
- Choose the right location for your flood light based on the desired illumination area.
- Determine the height at which you want to mount the flood light.
- Ensure you have a power source nearby to connect the flood light.
Installation Steps
Step 1: Prepare the Mounting Location
Use a drill or screwdriver to create pilot holes in the mounting location if necessary. Ensure the holes are slightly smaller than the screws or bolts you will use to secure the mounting bracket.
Step 2: Mount the Bracket
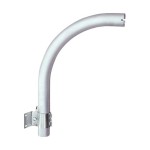
Align the mounting bracket with the pilot holes and secure it using screws or bolts. Ensure the bracket is firmly attached to the wall or surface.
Step 3: Connect the Electrical Wires
Strip the ends of the electrical wires using wire strippers.
Connect the wires to the corresponding terminals on the flood light and the power source. Typically, black wires connect to black terminals, white wires to white terminals, and green or bare wires to ground terminals.
Wrap electrical tape around each connection to ensure a secure and weatherproof bond.
Step 4: Mount the Flood Light
Position the flood light on the mounting bracket and secure it with screws or bolts.
Adjust the angle of the flood light to direct the light towards the desired area.
Step 5: Test the Flood Light
Turn on the power to the flood light and check if it illuminates properly.
Ensure the light is not obstructed by any obstacles.
Step 6: Final Adjustments
Once the flood light is installed and working correctly, make any necessary adjustments to the angle or position to optimize the lighting effect.
Safety Precautions
Always prioritize safety when working with electricity.
- Turn off the power to the circuit before starting any work.
- Use insulated tools and wear appropriate protective gear.
- If you are unsure about any step, consult a qualified electrician.
Conclusion
Installing outdoor LED flood lights is a straightforward and rewarding task. By following these steps and adhering to safety precautions, you can successfully illuminate your outdoor space, enhancing security, visibility, and ambiance.
Enjoy the benefits of well-lit outdoor areas and the energy efficiency and durability of LED flood lights.

How To Install Flood Lights With Pictures Wikihow

How To Install Outdoor Led Flood Lights Easy Follow Installation Guide Lepro Blog

How To Install Flood Lights

How To Wire A Floodlight

How To Install Led Flood Lights Tips And Tricks For A Successful Diy Project Simple Lighting Blog

How To Install Flood Lights With Pictures Wikihow

Electrical Wiring From A Photocell To An Outdoor Led Floodlight Or Reflector 110v Devices

Commercial Led Flood Lights Manufacturer Whole

How To Install Flood Lights Light Installation

How To Install Outdoor Led Flood Lights Easy Follow Steps For Diy
Related Posts
