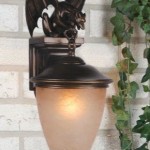
How to Install an Outdoor Gas Lamp
Adding an outdoor gas lamp to your property can significantly enhance its aesthetic appeal and functionality. These lamps provide a warm and inviting ambiance, illuminating pathways, patios, and other outdoor areas. Installing an outdoor gas lamp is a relatively straightforward process that requires basic tools and knowledge.
Planning and Preparation
Before embarking on the installation, it's crucial to plan and gather the necessary materials. Determine the ideal location for the gas lamp, considering factors such as access to gas lines, proximity to seating areas, and aesthetic appeal.
Ensure that you have all the required tools, including a wrench, pipe cutters, and a level. Additionally, gather materials such as a gas line extension kit, a sealant, and a post base if the lamp requires one.
Installing the Post Base
If the lamp includes a post or base, install it first. Dig a hole in the desired location, following the manufacturer's instructions. Place the post base in the hole, making sure it is level and secure. Backfill the hole with soil or sand and compact it firmly.
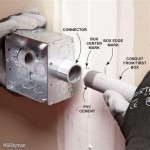
Gas Line Connection
Connect the gas line extension kit to the existing gas line. Ensure that the connections are tight and secure using a wrench. Run the gas line to the lamp's location, following the manufacturer's guidelines.
Apply a sealant around the connection points to prevent leaks. Use a gas leak detector to test the connections for any potential leaks before proceeding.
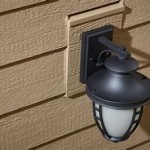
Lamp Assembly
Assemble the lamp according to the manufacturer's instructions. This may involve attaching the fixture, shade, and other components to the post or base. Make sure all the connections are tight and secure.
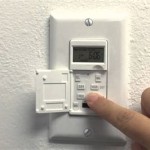
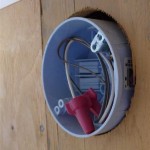
Electrical Connection
If the lamp requires an electrical connection for ignition or lighting control, follow the electrical wiring diagram provided by the manufacturer. Connect the wires to the appropriate terminals on the lamp and terminal block.
Secure the electrical connections with wire nuts and electrical tape. Ensure that the connections are protected from moisture and inclement weather.
Testing
Once the installation is complete, turn on the gas valve and light the lamp according to the manufacturer's instructions. Observe the flame for any irregularities or excessive flickering. Adjust the flame height as needed.
Monitor the lamp over the next few hours to ensure that it operates correctly and there are no gas leaks or other issues.
Maintenance
To ensure the longevity and optimal performance of your outdoor gas lamp, perform regular maintenance. Inspect the gas connections and flame annually and make any necessary adjustments. Clean the lamp fixture and shade as needed to prevent the accumulation of dirt and debris.

Gas Light Conversion Kit Diy1 89 95 To Led Looks Like A

Gas Patio Heaters 3 Installation Tips For Max Comfort

Install Gif

Brs Outdoor Gas Lantern

How To Update Or Replace A Lamp Post And Light

How To Install Outdoor Pendant Light Iron Gallery Llc Lights Web

How To Install A Solar Lamp Post

Gas Lantern Exterior Lighting Install Tiktok Search

Gas Lamp Atlanta Installation Repair

Lanterns Is This Too Simple And Could The One Be Modified By Still Using It S Mounting Plate Adding Porch Lighting Outdoor Gas
Related Posts