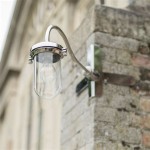
How To Install Low Voltage Outdoor Lights
Installing low voltage outdoor lights can transform your outdoor space, adding safety, ambiance, and aesthetic appeal. Whether illuminating a pathway, highlighting architectural features, or creating a cozy seating area, there are essential aspects to consider for a successful installation. This article will delve into the key steps, materials, and techniques involved to guide you through the process.
Planning and Design
Before you begin, plan the layout of your lighting system, considering the placement of lights, fixtures, and wires. Determine the desired brightness and coverage areas. Choose fixtures that complement the style and ambiance of your outdoor space. Consider using a combination of different fixtures, such as path lights, spotlights, and floodlights, to create varied lighting effects.
Materials and Equipment
Essential materials include low voltage fixtures, transformers, wires, connectors, and burial stakes. The transformer converts regular voltage to low voltage, ensuring safety and energy efficiency. Choose wires that are rated for outdoor use and have sufficient gauge for the length of the run. Connectors ensure secure and watertight connections between wires and fixtures.
Transformer Placement and Wiring
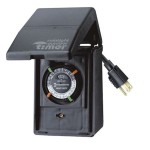
Locate the transformer near an outdoor electrical outlet. Connect the transformer to the outlet and secure it to a stable surface. Run the low voltage wires from the transformer to the lighting fixtures. Position the wires underground or along walls, using burial stakes or clips to secure them. Avoid sharp bends or kinks in the wires.
Fixture Installation
Follow the manufacturer's instructions for installing each fixture. Dig holes for path lights and insert them into the ground, ensuring they are level and stable. For wall-mounted fixtures, mark the mounting holes and drill into the surface. Secure the fixtures with bolts or screws.
Wiring Connections
Connect the wires to the fixtures using connectors or wire nuts. Ensure the connections are secure and waterproof. Wrap electrical tape around the connections for added protection. Test the lights before burying the wires.
Final Touches
Once the lights are operational, bury the wires underground, leaving a few inches exposed near the fixtures for maintenance. Backfill the holes with soil and tamp it down. Adjust the light fixtures to the desired angles and beam spread.
Conclusion
Installing low voltage outdoor lights requires careful planning, material selection, and proper installation techniques. By following these essential aspects, you can create a stunning and functional outdoor lighting system that enhances safety, ambiance, and the overall aesthetic appeal of your outdoor space.

Outdoor Low Voltage Lighting Diy Family Handyman

How To Wire Outdoor Low Voltage Lighting Part 2

The Easiest Way To Install Low Voltage Landscape Lighting Abby Organizes

How To Install Low Voltage Outdoor Landscape Lighting 1000bulbs Blog

How To Install Low Voltage Outdoor Landscape Lighting

How To Install Low Voltage Outdoor Deck Lighting

How To Install And Wire Low Voltage Outdoor Landscape Lighting

How To Wire Outdoor Low Voltage Lighting Part 3

3 Must Haves For Installing Low Voltage Landscape Lighting Ideas Advice Lamps Plus

Make Your Backyard Badass With Led Lighting The Art Of Doing Stuff
