How to Install a Halo Outdoor Security Light
Installing a Halo outdoor security light enhances property security and provides essential illumination. This guide offers a comprehensive step-by-step process for installing a typical Halo outdoor security light. Always consult the specific instructions included with your particular model, as wiring and mounting procedures may vary.
Safety Precautions
Safety should be the paramount concern during any electrical installation. Before beginning, ensure the power to the circuit is turned off at the main breaker box. Verify the power is off using a non-contact voltage tester. Using appropriate personal protective equipment (PPE), such as safety glasses and gloves, is also recommended.
Gathering Necessary Tools and Materials
Having the right tools and materials readily available streamlines the installation process. Typically, the following items are required:
- Non-contact voltage tester
- Screwdrivers (Phillips and flathead)
- Wire strippers/cutters
- Drill with appropriate drill bits (for masonry or wood)
- Level
- Wire connectors
- Electrical tape (optional)
- Silicone sealant (for weatherproofing)
- Mounting hardware (usually included with the light)
- Ladder (if necessary)
Preparing the Mounting Location
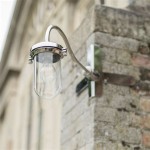
Choosing the ideal mounting location is crucial for effective security lighting. Consider areas that require illumination, such as entryways, walkways, and potential vulnerable points. The mounting surface should be structurally sound and capable of supporting the weight of the fixture.
If installing on a masonry surface, mark the mounting holes and drill pilot holes using the appropriate masonry drill bit. For wood surfaces, pilot holes may not be necessary, depending on the type of wood and screws provided.
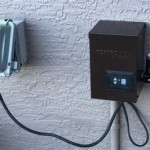
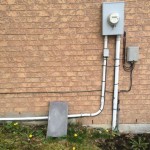
Connecting the Electrical Wiring
This step requires careful attention to ensure proper connections. With the power off, strip the ends of the existing wires from the junction box and the wires from the Halo security light. Use wire connectors to join the wires as follows:
- Black wire (hot) from the light to the black wire (hot) from the junction box.
- White wire (neutral) from the light to the white wire (neutral) from the junction box.
- Green or bare copper wire (ground) from the light to the green or bare copper wire (ground) from the junction box, and to the grounding screw on the mounting bracket if applicable.
Ensure all connections are secure and tightly capped with the wire connectors.
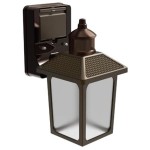
Mounting the Fixture
Carefully tuck the wired connections into the junction box. Align the mounting bracket of the Halo security light with the drilled holes or mounting surface. Secure the bracket using the provided screws, ensuring it is firmly attached. Mount the light fixture onto the bracket according to the manufacturer's instructions.
Sealing and Testing
Apply silicone sealant around the edges of the mounting bracket where it meets the wall to prevent water intrusion. Once the sealant is dry, restore power to the circuit. Test the light fixture to confirm it is functioning correctly.
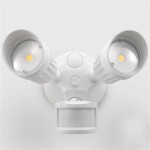
Adjusting the Light and Motion Sensor
Most Halo security lights feature adjustable heads and motion sensors. Direct the light beam towards the desired area. Configure the motion sensor sensitivity and duration settings according to your specific needs. Refer to the manufacturer's instructions for detailed guidance on adjusting these settings.
Troubleshooting Common Issues
If the light does not function correctly after installation, double-check the following:
- Verify the circuit breaker is turned on.
- Confirm all wire connections are secure and correctly matched.
- Check the bulb to ensure it is not burnt out.
- Consult the manufacturer's troubleshooting guide for model-specific issues.
Maintaining Your Halo Security Light
Regular maintenance ensures optimal performance and longevity. Periodically clean the lens and housing to remove dirt and debris. Check the bulb and replace it if necessary. Inspect the wiring and connections for any signs of damage or wear.

Halo Tgs 2500 Lumen Selectable White Motion Activated Outdoor Integrated Led Flood Light W Square Twin Heads 4000k Tgs2s402msrw The Home Depot

Halo Outdoor Floodlights And Area Lights Cooper Lighting Solutions

Halo Solar Outdoor Led Twin Head Flood And Security Light 180 Degree Motion Sensor 1000 Lumens Com

Halo Tgs Broe Motion Activated Outdoor Integrated Led Flood Light With Square Single Head 4000k 5800 Lumens Tgs5s401mscb The Home Depot

Halo Outdoor Floodlights And Area Lights Cooper Lighting Solutions

Halo Tgs 2500 Lumen Selectable Broe Motion Activated Outdoor Integrated Led Flood Light W Square Twin Heads 4000k Tgs2s402msrb The Home Depot

Review Halo Fsl 5800 Lumen Led Outdoor Security Light W Adjustable Color Temperature

Halo Metallic Dusk To Dawn Fluorescent Outdoor Area Light Fixture Hemlock Hardware

Halo Tgs Broe Motion Activated Outdoor Integrated Led Flood Light With Square Single Head 4000k 5800 Lumens Tgs5s401mscb The Home Depot

Halo Solar Outdoor Led Twin Head Flood And Security Light 180 Degree Motion Sensor 1000 Lumens Com
Related Posts