How to Install an Electrical Box for Outdoor Light: A Comprehensive Guide
Installing an electrical box for an outdoor light fixture requires careful planning and adherence to safety regulations. Whether you're upgrading an existing light or adding a new one, understanding the essential steps involved will ensure a successful and safe installation.
1. Safety First
Before commencing any electrical work, it is crucial to prioritize safety. Turn off the power supply at the circuit breaker or fuse box corresponding to the area where you'll be installing the light fixture. This step prevents the risk of electrical shocks and ensures a safe working environment.
2. Determine Box Location
Select an appropriate location for the electrical box. Outdoor light fixtures must be weatherproof and meet building codes for height and placement. Consider whether the fixture will be mounted on a wall, ceiling, or post and ensure adequate clearance from windows, doors, and other obstacles.
3. Choose the Right Box
Electrical boxes come in various sizes and types. For outdoor installations, use a weatherproof box made of galvanized steel or non-metallic materials. The box should have sufficient capacity to accommodate the wires and connectors of your light fixture.
4. Install the Box
Cut a hole in the wall, ceiling, or post using a hole saw or utility knife. The hole should be slightly larger than the electrical box. Insert the box into the hole and secure it firmly using mounting screws or bolts.
5. Run and Connect Wires
Run electrical wires from the power source to the electrical box. Use appropriate wire gauges and insulation ratings for outdoor applications. Connect the wires to the terminals in the electrical box, ensuring that the black wire is connected to the black terminal, the white wire to the white terminal, and the green or bare wire to the ground terminal.
6. Install the Fixture
Mount the light fixture over the electrical box and secure it in place according to the manufacturer's instructions. Ensure that the fixture is weatherproof and securely fastened.
7. Restore Power and Test
Turn on the power at the circuit breaker or fuse box. Test the light fixture to ensure it is functioning correctly. Check for any loose connections or flickering lights, which may indicate a problem with the installation.
Tips for Success
- Use outdoor-rated materials for all components, including wires, boxes, and fixtures.
- Seal all wire connections thoroughly with electrical tape or wire nuts to prevent water ingress.
- Consult your local building codes and regulations to ensure compliance.
- If you are not comfortable performing electrical work, consider hiring a qualified electrician for professional installation.
- Maintain the light fixture regularly to ensure continued functionality and safety.
By following these steps carefully, you can successfully install an electrical box for an outdoor light fixture. Remember to prioritize safety, choose the right materials, and secure all connections to ensure a reliable and weatherproof installation.

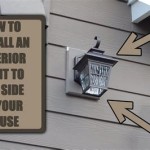
How To Install An Exterior Electrical Box For A Light Fixture On The Wood Siding

Replacing An Outdoor Light Fixture

Replacing An Outdoor Light Fixture

Surface Mount Junction Box For Exterior Light Greenbuildingadvisor

How To Install A Porch Light Exterior Fixtures Lighting

Replacing An Outdoor Light Fixture

How To Replace An Outdoor Light

How To Install An Exterior Electrical

How To Replace An Outdoor Light

How To Properly Install An Exterior Gfci
Related Posts