How to Install an Outdoor Security Light: A Comprehensive Guide
Outdoor security lights are a crucial element of home security, illuminating dark areas and deterring potential intruders. Installing them correctly is essential to maximize their effectiveness and ensure proper functionality. Here's a comprehensive guide to help you install an outdoor security light like a pro:
1. Choose the Right Light Fixture
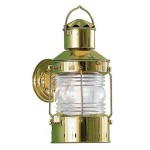
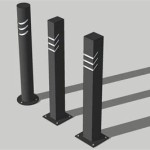
Start by selecting a light fixture that suits your needs. Consider the wattage and brightness required to illuminate the desired area. Opt for energy-efficient LED lights for cost savings and longevity. Choose a design that complements your home's exterior and provides adequate coverage.
2. Determine the Mounting Location
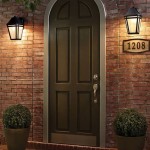
Select a location for the light fixture that provides maximum visibility and coverage of vulnerable areas. Avoid placing it too close to windows or doors, as this can create blind spots. Consider the distance between the light and the area to be illuminated.
3. Install the Mounting Plate
Most outdoor security lights come with a mounting plate that secures the fixture to the wall or ceiling. Use a stud finder to locate studs and mark their location. Hold the mounting plate against the wall, align it, and fasten it securely with screws or bolts.
4. Wiring the Light Fixture
Turn off power at the breaker panel before starting any electrical work. Connect the wiring from the light fixture to the wires in the electrical junction box. Ensure the color-coded wires are connected correctly (black to black, white to white, and green to ground). Secure the connections with wire nuts and electrical tape.
5. Install the Light Fixture
Mount the light fixture onto the mounting plate. Secure it according to the manufacturer's instructions, using the provided screws or bolts. Ensure the fixture is firmly attached and does not wobble or move.
6. Restore Power and Test
Turn the power back on at the breaker panel. The light should illuminate immediately. Check if it is functioning correctly and provides adequate coverage. Adjust the angle of the light fixture if necessary to optimize illumination.
7. Motion Sensor Setup (Optional)
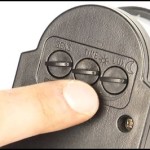
If the light fixture is equipped with a motion sensor, adjust the sensitivity and detection range following the manufacturer's instructions. Set the sensor to trigger the light when it detects motion within the desired area.
Tips for Ideal Outdoor Security Lighting
- Install lights around entrances, windows, and other vulnerable areas.
- Use motion-activated lights to deter intruders.
- Consider solar-powered lights for off-grid or energy-saving purposes.
- Maintain a clean and unobstructed path between the light and the area to be illuminated.
- Regularly check and replace bulbs to ensure optimal performance.

Led Security Lights The Ultimate Guide To Home Safety

How To Install An Exterior Motion Sensor Light Security Lights Diy Home

4 Tips For Outdoor Security Lighting Haas Sons

Everything You Need To Know About Security Light Installation

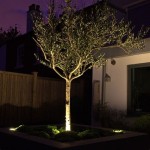
Outdoor Security Lights Installed Home Garden Lighting

How To Install A Security Light The Easy Way

Installing Outside Security Lights Costs

There Are Numerous Diffe Types Of Outdoor Lights But Which Ones The Best For Motion Sensor Security

Installing A Motion Sensor Light Fine Homebuilding

How To Install A Security Light The Easy Way