How to Install an Outdoor Light Switch
Installing an outdoor light switch is a common home improvement project that can enhance both the functionality and aesthetics of your outdoor space. It allows for convenient control of exterior lighting fixtures, providing security, illumination, and ambiance for your home. This guide will provide a step-by-step explanation of how to install an outdoor light switch, ensuring a safe and efficient installation process.
1. Gather Necessary Materials and Tools
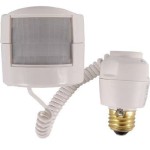
Before embarking on the installation process, ensure you have all the necessary materials: * **Outdoor-rated light switch:** Choose a weatherproof switch specifically designed for outdoor use. * **Electrical box:** Select a box that is suitable for the switch type and meets local building codes. * **Electrical wire (Romex):** The wire gauge must be appropriate for the switch's amperage rating. * **Wire connectors (wire nuts):** Use connectors that are compatible with the wire size. * **Grounding wire:** Ensure the ground wire is properly connected. * **Screwdrivers:** Flathead and Phillips screwdrivers are essential for installation. * **Wire stripper:** Use a wire stripper to remove insulation from the wires. * **Voltage tester:** Essential for confirming power is off before working with wiring. * **Safety glasses and gloves:** Protect your eyes and hands during installation. * **Level:** Ensure the switch is mounted straight and level. * **Tape measure:** Measure accurately to ensure proper switch placement.
2. Locate and Turn Off Power
The first and most crucial step is ensuring the electrical circuit is de-energized. Locate your electrical panel and identify the breaker that controls the outdoor light circuit. Turn off the breaker and use a voltage tester to confirm that power is off at the switch location. This step is paramount for safety and prevents electrical shock hazards.
3. Prepare the Switch Location
Determine the ideal location for your outdoor switch. Choose a spot that is easily accessible, protected from direct weather elements, and offers convenient control over the light fixture. Using a level and tape measure, mark the location on the wall or surface where the switch will be mounted. Ensure the chosen spot is free from obstructions and offers sufficient space for the electrical box.
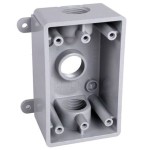
4. Mount the Electrical Box
Securely mount the electrical box to the chosen location using appropriate screws or mounting hardware. Ensure that the box is level and firmly attached to the wall or surface. The box should be properly grounded according to local building codes.
5. Connect Wiring
Carefully remove the insulation from the ends of the electrical wires using a wire stripper. Connect the wires from the light fixture and the incoming power source to the switch terminals. Connect the black wire to the "hot" terminal (usually black or brass), the white wire to the "neutral" terminal (usually white or silver), and the green or bare copper wire to the "ground" terminal (usually green or bare). Make sure the wire connections are tight and secure. The wire connections should be made within the electrical box, ensuring that the wires do not come into contact with each other or exposed metal.
6. Install the Switch
Attach the switch to the electrical box, ensuring that the switch plate is flush with the wall and aligns with the chosen location. Secure it using the appropriate screws or mounting hardware.
7. Test the Switch
After completing the wiring and installation, carefully turn the breaker back on. Use a voltage tester to confirm that power is restored to the circuit. Finally, test the switch by turning it on and off to ensure it is functioning correctly. If the light is on, the switch is working as intended.
Remember to consult local building codes and regulations for specific requirements and installations. If you are unsure about any aspect of the installation process, it is advisable to seek assistance from a qualified electrician.

How To Wire A Light Switch And Outside Together Ehow

Adding An Extra Light From A Switch

How To Install A One Way Light Switch Socketsandswitches Com

Tutorial Outdoor Light Switch Installation Crafting Is My Therapy

How To Install A Two Way Light Switch Socketsandswitches Com

How To Install A One Way Light Switch Socketsandswitches Com

Electrical Help How To Install A Light Switch Outside

Adding An Extra Light From A Switch

How To Wire A Light Switch Downlights Co

How To Wire A Light Switch Downlights Co
Related Posts