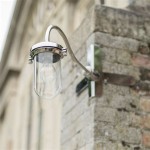
How To Ground An Outdoor Light Fixture
Before embarking on the task of grounding an outdoor light fixture, it is imperative to delve into the intricacies of the process, encompassing the vital aspects that ensure its successful and safe execution. Understanding these fundamental elements will empower homeowners to approach this electrical endeavor with confidence, guaranteeing a secure and illuminated outdoor space.
In this comprehensive guide, we will meticulously dissect the essential aspects of grounding an outdoor light fixture, encompassing the selection of appropriate grounding materials, the proper installation techniques, and the crucial safety considerations that must be meticulously adhered to throughout the process.
Essential Aspects of Grounding an Outdoor Light Fixture:
1. Grounding Materials: Copper or Galvanized Steel
The cornerstone of grounding an outdoor light fixture lies in the judicious selection of grounding materials. Copper, renowned for its excellent conductivity and longevity, stands as the preferred choice for grounding applications. However, galvanized steel, with its resilient corrosion resistance, emerges as an equally viable alternative.
2. Grounding Rod: 8 Feet or Longer
The grounding rod, a linchpin of the grounding system, plays a pivotal role in channeling electrical currents safely into the earth. For optimal performance, it is imperative to select a grounding rod that measures at least 8 feet in length to ensure adequate contact with the earth's conductive soil.
3. Grounding Wire: 12-Gauge or Thicker
The grounding wire, the conduit through which electrical currents are conveyed to the grounding rod, must possess ample conductivity to effectively dissipate any potential surges. A 12-gauge grounding wire or thicker is highly recommended for outdoor light fixture grounding applications.
4. Grounding Clamp: Secure and Corrosion-Resistant
The grounding clamp, responsible for establishing a secure connection between the grounding wire and the grounding rod, must be meticulously chosen to ensure longevity and unwavering reliability. Opting for a corrosion-resistant grounding clamp is paramount to withstand the rigors of outdoor exposure.
5. Electrical Tape: Weatherproof and Insulating
Electrical tape, employed to insulate and protect electrical connections from the elements, plays a pivotal role in ensuring the integrity of the grounding system. Employing weatherproof electrical tape specifically designed for outdoor use is crucial to withstand the vagaries of nature.
6. Safety Considerations: Disconnect Power and Wear Protective Gear
Prior to commencing any electrical work, it is imperative to disconnect the power source to the outdoor light fixture for the utmost safety. Additionally, wearing appropriate protective gear, including gloves and safety glasses, is paramount to safeguard against any potential electrical hazards.
Conclusion:
Grounding an outdoor light fixture is a critical task that requires meticulous attention to detail and adherence to safety protocols. By understanding the essential aspects outlined in this guide, homeowners can confidently undertake this electrical endeavor, ensuring the secure and reliable illumination of their outdoor spaces.

How To Install An Outdoor Light Fixture Des And Sses

Home Improvement How To Remove Replace Outdoor Light Fixtures Porch Driveway Etc

How To Replace An Outdoor Light

Outdoor Light Fixture Change Up

How To Replace An Outdoor Light

Home Improvement How To Remove Replace Outdoor Light Fixtures Porch Driveway Etc

Replacing An Outdoor Light Fixture Concord Carpenter

How To Install A Yard Light Post Electrical Projects Home Wiring Lights

Outdoor Light Fixture Change Up

Replacing An Outdoor Light Fixture Concord Carpenter