How to Connect Outdoor Sensor Lights
Outdoor sensor lights provide a vital layer of security and convenience for homes and businesses. Utilizing motion detection, these lights automatically illuminate areas as needed, deterring potential intruders and enhancing visibility at night. Connecting these lights involves a few key steps, encompassing wiring and power connections. Understanding the process ensures a safe and functional installation.
Step 1: Gather Materials and Tools
Before embarking on the installation, it is essential to gather the necessary materials and tools. This includes:
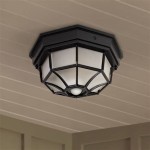
- Outdoor sensor light fixture: Choose a light fixture that meets your specific needs and aesthetic preferences. Consider factors such as brightness, light type (LED, halogen), and sensor range.
- Electrical wire: Use the appropriate gauge of wire based on the light fixture's wattage and the distance from the power source. Typically, 14-gauge wire is suitable for most applications.
- Wire connectors: These connectors ensure secure and safe connections between different wires. Choose weatherproof connectors for outdoor use.
- Electrical tape: Use electrical tape to insulate and secure wire connections.
- Junction box: A weatherproof junction box provides a safe and organized housing for wire connections. It should be large enough to accommodate all wires.
- Screwdrivers: Different sizes of screwdrivers will be needed for mounting the light fixture and connecting wiring.
- Wire strippers: Use wire strippers to remove insulation from the ends of wires for proper connection.
- Voltage tester: A voltage tester is essential for ensuring the power supply is disconnected before working on wiring.
- Ladder: A sturdy ladder is required to safely reach the mounting location for the light fixture.
Step 2: Locate the Power Source and Disconnect Power
The next step is to locate the power source for the outdoor sensor light. This could be an existing junction box or a nearby electrical outlet. Once located, it is essential to disconnect power to the circuit to ensure safety during the installation process. This can be done by flipping the corresponding circuit breaker in the main electrical panel.
Use a voltage tester to confirm that the power is completely disconnected before proceeding with wiring. This precaution is crucial to prevent electric shocks and injuries.
Step 3: Run Electrical Wiring
With the power disconnected, run the electrical wire from the power source to the chosen mounting location for the light fixture. If new wiring is required, use a conduit or raceway to protect the wires from weather damage. Route the wire along a safe and discreet path, avoiding obstructions and potential hazards.
For installations requiring new wiring, it is recommended to consult with a qualified electrician to ensure code compliance and safety.
Step 4: Connect the Wires
Once the wiring is in place, connect the wires to the light fixture and the power source. Each wire should be connected to the corresponding terminal in the junction box. The typical wire colors used for electrical connections are:
- Black wire: Hot wire, carrying electricity from the power source.
- White wire: Neutral wire, completing the electrical circuit.
- Green or bare wire: Ground wire, providing a path for electricity in case of a fault.
Connect the wires with wire connectors, twisting them together securely. Use electrical tape to insulate the connections and ensure they are weatherproof. Ensure all connections are properly made and secured within the junction box.
Step 5: Mount the Light Fixture
With the wiring complete, mount the light fixture to its designated location. Use the provided hardware or appropriate screws for secure and stable mounting. Align the fixture properly, ensuring that the sensor is positioned to detect motion effectively.
Step 6: Test Functionality
Once the light fixture is installed, reconnect power to the circuit and test the functionality. Ensure the sensor light turns on when motion is detected and illuminates the area as intended. Adjust the sensitivity and time settings of the sensor according to your preferences.
If the light does not function correctly, carefully review the wiring connections and troubleshoot any issues. If you are unsure, consult with a qualified electrician for assistance.

How To Wire Motion Sensor Occupancy Sensors

How To Install Security Lights Diy Family Handyman

Elegant Wiring Diagram Ceiling Light Diagrams Digramssample Diagramimages Wiringdiagramsam Outdoor Flood Lights Sensor Lighting Wire

How To Wire Motion Sensor Occupancy Sensors

How To Wire A Motion Sensor An Existing Light Rayzeek

Pir Motion Sensor Switch Vtac

How To Wire Pir Motion Sensor Light Switch

Motion Sensor Light Switch Wiring Doityourself Com Community Forums

Unique Wiring Diagram For Outdoor Motion Detector Light Diagrams Digramssample Diagramimage Flood Lights Sensor Lighting Wire

How To Install An Outdoor Motion Sensor Light With Pictures
Related Posts