How To Connect Outdoor Lights House
Installing outdoor lights can improve the aesthetic appeal and safety of your home. Whether you are adding lights to your patio, deck, or walkway, understanding the essential aspects of connecting outdoor lights is crucial for a successful installation. This guide will cover the essential aspects of connecting outdoor lights, ensuring a safe and functional lighting system for your outdoor space.
## Essential Aspects of Connecting Outdoor Lights1. Safety First
Electricity can be hazardous, so safety should be your top priority when connecting outdoor lights. Ensure that you have the necessary tools and wear appropriate safety gear. Turn off the electricity at the main breaker before beginning any work and double-check that the power is off using a voltage tester.
2. Plan Your Lighting
Before starting the installation, determine where you want your lights placed and how you will route the wiring. Consider the purpose of the lights, the desired brightness, and the aesthetics of your outdoor space. Draw a diagram or sketch to visualize your lighting plan.
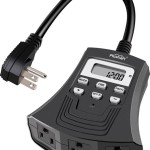
3. Choose the Right Wiring
Select the appropriate wiring for your outdoor lights. Use outdoor-rated wire that is resistant to moisture and sunlight. The thickness of the wire (gauge) depends on the wattage of your lights. Consult an electrician if you are unsure about the gauge of wire required.
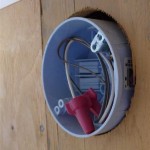
4. Install Junction Boxes
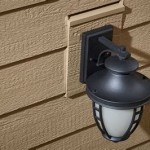
Junction boxes provide a safe and weatherproof enclosure for electrical connections. Install junction boxes at each light fixture and at any points where wires join or branch off. Use waterproof junction boxes and seal all openings with silicone.
5. Connect the Lights
Connect the wires from the power source to the junction boxes and then to the light fixtures. Use wire nuts or connectors to secure the connections. Wrap electrical tape around the connections for added protection against moisture and ensure all connections are tight.
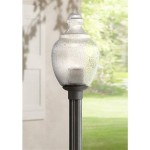
6. Mount the Lights
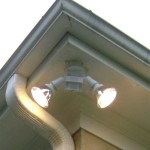
Securely mount the light fixtures to the walls, posts, or other surfaces using appropriate mounting hardware. Ensure that the lights are level and firmly attached.
7. Restore Power and Test
After completing the installation, restore power at the main breaker and test the lights. Check if all lights are functioning correctly and ensure that there are no loose connections or flickering.
Conclusion: Achieving a Safe and Functional Outdoor Lighting System
Connecting outdoor lights requires careful planning, attention to safety, and proper installation techniques. By following the essential aspects outlined in this guide, you can create a beautiful and functional outdoor lighting system that enhances the safety and aesthetics of your home.

How To Install Your Own Outdoor Backyard Lighting My 100 Year Old Home

How To Install Outdoor Lighting 14 Steps With Pictures

Tips For Installing Outdoor Lighting Riverfront Estates

Outdoor Lighting Basic Troubleshooting Tips Lanai Lights

Installing Outdoor Landscape Lighting Easy By Home Repair Tutor

Step By Guide Installing Outdoor Lighting Around Your Home Govee

Install Landscape Lighting For Added Curb Appeal

4 Ways To Use Uplights Outdoor Lighting Rensen House Of Lights

Outdoor Light Easy Installation Without Touching The House Electrics

How To Light The Front Of Your House
Related Posts