How to Connect Outdoor Lights
Outdoor lighting can enhance the beauty and safety of your property, creating a welcoming ambiance and deterring unwanted visitors. Connecting these lights effectively requires understanding the basic principles of electrical wiring and safety precautions. This article will guide you through the process of connecting outdoor lights, providing step-by-step instructions and essential safety tips.
1. Planning and Preparation
Before commencing any electrical work, it is crucial to plan and prepare adequately. This involves assessing your existing electrical system, determining the appropriate type of outdoor lighting, and gathering the necessary tools and materials.
Assessing Your Electrical System
Inspect your electrical panel and identify the circuit breaker that controls the outdoor area where you intend to install the lights. Ensure that the circuit has adequate capacity to handle the additional load. If you are unsure about your electrical system, consult a qualified electrician.
Choosing the Right Outdoor Lights
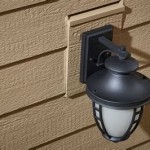
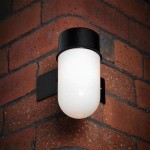
Outdoor lights come in various styles, sizes, and functionalities. Consider the purpose of the lights, the desired aesthetic, and the available power source. For example, you might need different types of lights for security purposes, landscape illumination, or patio ambience.
Gathering Necessary Tools and Materials
You will need the following tools and materials:
- Wire strippers
- Wire cutters
- Screwdriver
- Voltage tester
- Safety glasses
- Work gloves
- Outdoor-rated electrical wire
- Junction box
- Weatherproof electrical tape
- Ground fault circuit interrupter (GFCI) outlet (if required)
2. Connecting the Lights
Once you have planned and gathered the necessary materials, you can begin connecting the lights. This process involves running the electrical wire from the power source to the lights, making proper connections, and ensuring safety.
Running the Electrical Wire
Start by locating the power source, which could be an existing outlet, a dedicated circuit breaker, or a junction box. Run the outdoor-rated electrical wire from the power source to the location of the lights, ensuring that the wire is securely fastened to the walls or ground, and that it is protected from potential damage. You might need to use conduit or PVC pipe to protect the wire from moisture and other environmental factors.
Making the Connections
At the power source, connect the electrical wire to the appropriate terminals. Strip the insulation off the ends of the wire, exposing the bare copper wires. Connect the black (hot) wire to the black (hot) terminal, the white (neutral) wire to the white (neutral) terminal, and the green (ground) wire to the green (ground) terminal. Make sure the connections are secure and properly insulated using weatherproof electrical tape. Repeat this process at the light fixture.
Safety Considerations
Throughout the entire process, prioritize safety by adhering to these precautions:
- Always work with the power off to avoid electrical shock.
- Use a voltage tester to confirm that the power is off before touching any electrical wires.
- Never overload the circuit by connecting too many lights.
- Ensure that all electrical connections are secure and properly insulated.
- Install GFCI outlets for outdoor applications, especially near water or moisture.
- Use outdoor-rated electrical wire and light fixtures designed for outdoor use.
3. Testing and Completion
After connecting the lights, it is essential to test them to ensure they are functioning correctly and safely.
Testing the Lights
Turn on the power at the circuit breaker and check if the lights are illuminated. If the lights do not work, recheck the connections and ensure that the circuit breaker is turned on. If the lights are working, inspect them for proper illumination and functionality.
Final Steps
Once you have confirmed that the lights are working correctly, you can proceed with the final steps, such as securing the wire and fixtures to the walls or ground, and adding any necessary decorative elements. Ensure that the lights are positioned strategically to achieve the desired illumination and aesthetic effects.
Connecting outdoor lights is a relatively simple process that can greatly enhance the appearance and functionality of your property. By following these detailed instructions, you can successfully connect outdoor lights while prioritizing safety and achieving the desired results.

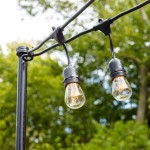
How To Hang Outdoor String Lights And Make Them Look Good Wirecutter

Replacing Landscape Lighting Quick Connectors Porch Daydreamer

How To Hang Outdoor String Lights And Make Them Look Good Wirecutter

Outdoor Low Voltage Lighting Diy Family Handyman

Using A Cable To Hang String Lights Concord Carpenter

Using A Cable To Hang String Lights Concord Carpenter

How Do You Connect Your Low Voltage Outdoor Lights Garden Landscape Lighting

How To Hang Outdoor String Lights Resource Article By Partylights Com

How Do You Install Philips Hue Outdoor Lighting On High Voltage Coolblue Anything For A Smile

How To Fit Outdoor Lights Lighting Electrical Security B Q