How to Connect Outdoor Lighting Cable
Connecting outdoor lighting cable is a crucial step in creating a visually appealing and functional outdoor space. It's a relatively straightforward process that can be achieved by homeowners with basic electrical knowledge. This article will guide you through the essentials of connecting outdoor lighting cable, ensuring a safe and successful installation.
Understanding Outdoor Lighting Cable
Outdoor lighting cable, also known as landscape lighting cable, is specifically designed for outdoor use. It features weather-resistant insulation and materials that can withstand harsh conditions. The cable is available in various sizes and types, denoted by AWG (American Wire Gauge) numbers. The gauge indicates the thickness of the wire, with lower numbers representing thicker and heavier cables that can handle higher power demands.
Common types of outdoor lighting cable include:
- Direct burial cable: This cable is designed to be buried directly in the ground, offering protection from weather and foot traffic.
- Low-voltage cable: This type of cable operates at a lower voltage than standard household wiring, making it safer for outdoor installations.
- LED cable: This specialized cable is designed for use with LED lights, offering high efficiency and longevity.
Planning and Preparation
Before you begin connecting outdoor lighting cable, it's essential to plan and prepare the installation properly. This includes:
- Determine the lighting layout: Plan the placement of lights, considering their purpose and the overall aesthetic of the outdoor space.
- Choose the appropriate cable: Factor in the number of lights, the distance between them, and power requirements when selecting the cable gauge.
- Gather materials: In addition to the cable, you'll need connectors, wire strippers, electrical tape, and possibly tools for digging trenches.
- Obtain necessary permits: In some jurisdictions, permits may be required for electrical work, including outdoor lighting.
Connecting Outdoor Lighting Cable
Once you have planned and prepared, you can begin connecting the outdoor lighting cable. Follow these steps:
- Run the cable: If you are burying the cable, dig a trench deep enough to protect it from foot traffic and frost. If running the cable above ground, secure it to walls or fences using cable ties or staples.
- Connect the cable to the power source: Use a weatherproof junction box to connect the cable to the power source, typically located near the house. You may require a transformer if using low-voltage lighting.
- Connect the cable to the lights: Connect the cable to each light fixture using appropriate connectors. Make sure the connections are secure and waterproof.
- Test the lights: Once all connections are made, turn on the power and test the lights to ensure they are functioning correctly.
Safety Considerations
It's essential to prioritize safety when working with electricity. Here are some important safety considerations:
- Turn off the power: Always turn off the power at the breaker box before working on any electrical wiring.
- Use proper tools and equipment: Use insulated tools and wear protective gear, such as rubber-soled shoes and gloves.
- Avoid overloading the circuit: Make sure the cable and circuit breaker are rated for the total load of the lights.
- Inspect the cable regularly: Inspect the cable for any damage or wear and tear, and replace it if necessary.
Additional Tips
- Use a cable tester: A cable tester can help identify and diagnose problems if the lights are not working correctly.
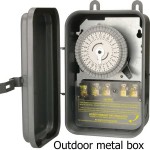
- Consider using a timer: Install a timer to automatically turn on and off the lights at designated times.
- Hire a professional: If you're not comfortable working with electricity, consult a licensed electrician for professional help.

How To Install Low Voltage Landscape Lighting System World Leader In Cables

Outdoor Low Voltage Lighting Diy Family Handyman

Installation Help For Outdoor Lighting

How To Make A Low Voltage Lighting Connection

Using A Cable To Hang String Lights Concord Carpenter

How To Install Low Voltage Outdoor Landscape Lighting The Garden Glove

Using A Cable To Hang String Lights Concord Carpenter

Wiring Installation Coastal Source

How To Hang Outdoor String Lights Resource Article By Partylights Com

How To Install A Yard Light Post Electrical Projects Outdoor Lamp Posts Home Wiring