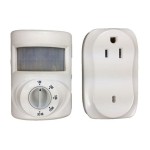
How To Connect Outdoor Light Sensor
Installing an outdoor light sensor can significantly enhance your home's security and energy efficiency. By detecting the presence of motion or darkness, these sensors automatically activate or deactivate your outdoor lighting, ensuring that your property is well-lit when it needs to be, and conserving energy when it doesn't. To ensure proper functionality of your outdoor light sensor, it's essential to connect it correctly. Here's a comprehensive guide to help you through the process:
Gather Your Tools and Materials
Before getting started, gather the following tools and materials:
- Outdoor light sensor
- Outdoor light fixture
- Wire strippers
- Electrical tape
- Screwdriver
- Electrical box (optional)
Choose a Suitable Location
For optimal performance, select a location for your outdoor light sensor where it can effectively detect motion or changes in light levels. Ideally, place the sensor near the area you want to illuminate, such as a pathway, doorway, or driveway. Avoid placing it in direct sunlight or near trees or bushes that could obstruct its view.
Install the Electrical Box (Optional)
If your outdoor light fixture does not have an existing electrical box, you will need to install one. Mount the electrical box to the wall or ceiling at the desired location using screws. Ensure that the box is level and securely fastened.
Connect the Sensor to the Light Fixture
Locate the wires coming from your outdoor light sensor. Strip approximately half an inch of insulation from the ends of each wire using wire strippers. Twist the exposed copper wires from the sensor together with the corresponding wires from the light fixture, ensuring that the black wires are connected to each other, the white wires are connected to each other, and the bare or green wires (if present) are connected to each other. Secure the connections with electrical tape.
Mount the Sensor and Light Fixture
If using an electrical box, mount the light sensor to the box using the provided screws. If not using an electrical box, mount the sensor directly to the wall or ceiling using screws. Once the sensor is secure, mount the outdoor light fixture as per the manufacturer's instructions.
Test the Sensor
Switch on the power to your outdoor light fixture and test the sensor's functionality. If the light turns on when motion is detected or when it gets dark, and turns off when there is no motion or it gets light, then the sensor has been connected correctly. If the sensor is not working properly, check the connections and ensure that the wires are twisted together securely.
Enjoy the Benefits
With your outdoor light sensor now properly connected, you can enjoy the benefits of enhanced home security and energy efficiency. The sensor will automatically illuminate your outdoor areas when needed, providing peace of mind and deterring potential intruders. Additionally, by only activating the lights when necessary, you can significantly reduce your energy consumption and save money on your utility bills.

How To Add Motion Sensor Outdoor Lights With Or Function Doityourself Com Community Forums

How To Wire Motion Sensor Occupancy Sensors Lights Outdoor

How To Wire Motion Sensor Occupancy Sensors

Motion Sensor Lights Outdoor Light

Elegant Wiring Diagram Ceiling Light Diagrams Digramssample Diagramimages Wiringdiagramsam Outdoor Flood Lights Sensor Lighting Wire

How To Install Security Lights Diy Family Handyman

Unique Wiring Diagram For Outdoor Motion Detector Light Diagrams Digramssample Diagramimage Flood Lights Sensor Lighting Wire

How To Add A Light Sensor Outdoor Lanterns The Navage Patch

Zenith Motion Sensor Wiring Diagram Outside Lights To Handyman Wire Home Electrical

How To Install An Outdoor Motion Sensor Light With Pictures
Related Posts


