How To Connect Outdoor Landscape Lighting: A Comprehensive Guide
Outdoor landscape lighting enhances the aesthetics, safety, and functionality of your outdoor spaces. However, connecting these lights can seem daunting if you're not familiar with electrical work. This comprehensive guide will provide you with step-by-step instructions and essential tips for connecting your outdoor landscape lighting.
1. Plan Your Design
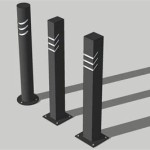
Before you start wiring, it's crucial to plan your design. Determine the areas you want to illuminate, the type of fixtures you'll need, and the placement of the lights. Consider the overall aesthetics, functionality, and safety requirements.
2. Select the Right Cable
Choose landscape-grade cable specifically designed for outdoor use. Direct burial cable is ideal for underground wiring, while SPT-1W cable is suitable for above-ground connections. Determine the appropriate wire gauge based on the wattage and length of your lighting system.
3. Dig Trenches (If Necessary)
If you're burying the cable, dig shallow trenches approximately 6 inches deep. Use a trenching tool to make clean and even cuts. Lay a layer of sand or gravel in the trench for cable protection.
4. Wire the Transformer
Connect the transformer to a dedicated circuit in your electrical panel. Follow the manufacturer's instructions for connecting the wires and securing the transformer. Waterproof all wire connections with electrical tape.
5. Connect the Fixtures
Attach the cable to the fixtures using waterproof wire connectors. Ensure that the wire connections are secure and protected by sealant. Connect the fixtures to the transformer using daisy-chaining or parallel connections. Test each fixture to ensure it's working.
6. Backfill the Trenches
Once the wiring is complete, backfill the trenches with the soil or sand that was removed. Tamp down the soil to ensure the cable is secure.
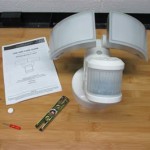
7. Install Controls
Install the lighting controls, such as a timer or motion sensor. Connect the controls to the transformer according to the manufacturer's instructions.
8. Test and Adjust
Turn on the lighting system and check if everything is functioning properly. Adjust the fixtures as needed to achieve the desired illumination. Regularly inspect and maintain the lighting system to ensure its safety and effectiveness.
Essential Tips:
- Hire a licensed electrician if you're not comfortable working with electricity.
- Use weatherproof fixtures and wire connectors.
- Place lights strategically to highlight architectural features and create a safe environment.
- Consider using energy-efficient LED fixtures.
- Regularly clean the fixtures to maintain their performance.
By following these steps and tips, you can successfully connect your outdoor landscape lighting and transform your outdoor spaces into a vibrant and inviting area.

Wiring Installation Coastal Source

Outdoor Low Voltage Lighting Diy Family Handyman

How To Install Low Voltage Outdoor Landscape Lighting 1000bulbs Blog

Installing Outdoor Landscape Lighting Home Repair Tutor

The Easiest Way To Install Low Voltage Landscape Lighting Abby Organizes

How To Install Low Voltage Outdoor Landscape Lighting The Garden Glove

Outdoor Lighting Installation Tips Instructions Ahs

How To Install Your Own Outdoor Backyard Lighting My 100 Year Old Home

How To Install Landscape Lighting Hamilton Park Home

How To Guide Landscape Lighting Installation Flip The Switch