Essential Aspects of Changing Outdoor Pot Lights
Outdoor pot lights play a crucial role in enhancing the aesthetics and safety of your outdoor spaces. As time passes, these lights may require replacement due to various reasons such as flickering, dimming, or complete failure. Changing outdoor pot lights is a relatively straightforward task that can be completed in a few simple steps.
Gather Necessary Tools and Materials
Before embarking on this project, it's essential to gather the necessary tools and materials. These include:
- New outdoor pot light fixture
- Phillips screwdriver or drill
- Electrical tape
- Safety glasses
- Gloves (optional)
Safety Precautions
Always prioritize safety when working with electricity. Before starting, ensure the power supply to the pot light is turned off at the circuit breaker or fuse panel. Wear safety glasses and gloves for protection.
Remove Old Pot Light
Locate the screws securing the old pot light to the junction box. Using a Phillips screwdriver or drill, carefully remove the screws. Once the screws are removed, gently pull the pot light fixture straight out of the junction box.
Disconnect Electrical Wires
Inside the junction box, you will find three wires connected to the old pot light: a black wire (hot), a white wire (neutral), and a green or bare copper wire (ground). Use a screwdriver to loosen the terminal screws and disconnect the wires.
Note: Take a note of how the wires are connected for reference when installing the new fixture.
Prepare and Install New Pot Light
Strip approximately 1/2 inch of insulation from the ends of the wires on the new pot light fixture. Wrap electrical tape tightly around each connection to prevent short circuits.
Connect the wires to the terminal screws in the junction box, ensuring the black wire is connected to the hot terminal, the white wire to the neutral terminal, and the green or bare copper wire to the ground terminal.
Carefully slide the new pot light fixture into the junction box and secure it with the screws.
Test and Finish
Restore power to the circuit breaker or fuse panel. Turn on the switch to test the new pot light. If it functions correctly, the installation is complete.
Additional Tips
- Use waterproof pot lights specifically designed for outdoor use.
- Ensure the pot light is securely mounted to prevent water leakage.
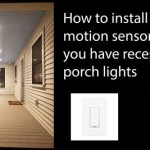
- Consider installing a timer or motion sensor to automate the lighting.
- If you encounter any difficulties, do not hesitate to consult a qualified electrician.

How To Replace Exterior Recessed Light Fixture

Replacing An Outdoor Light Fixture Concord Carpenter

Recessed Lighting Wiring Instructions Doityourself Com

5 Minute Light Upgrade Converting A Recessed To Pendant Can Lights Covers Diy

How Outdoor Lighting Can Change Your Home Rainscapes

Color Changing Security Down Lighting First Coast Trim Light

Outdoor Color Change Recessed Lights Tiktok Search

How To Change A Recessed Can Light Into Pendant With No Remodeling Lights Pot

Commercial Electric Ultra Slim 6 In Adjustable Cct Canless New Construction Remodel Ic Rated Indoor Outdoor Led Recessed Light Kit 91461 The Home Depot

Govee Permanent Outdoor Lights Review Never Climb That Ladder Again The Gadgeteer
Related Posts