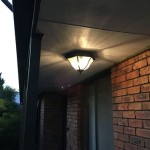
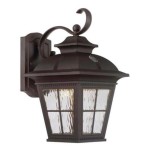
How to Change an Outdoor Light Fixture Bulb: A Comprehensive Guide
Maintaining the illumination of your outdoor spaces is crucial for safety and security. One common task that homeowners may encounter is changing the bulb in an outdoor light fixture. While it may seem like a simple job, there are specific steps to follow to ensure a safe and successful installation.
In this comprehensive guide, we will cover the essential aspects of changing an outdoor light fixture bulb, providing detailed instructions and safety precautions. Whether you are a seasoned DIYer or a novice homeowner, this step-by-step tutorial will empower you to tackle this task confidently.
Materials Required
- New outdoor light fixture bulb
- Phillips screwdriver or hex key (depending on fixture type)
- Gloves (optional, but recommended)
- Ladder (if necessary)
Safety Precautions
Before you begin, always prioritize safety. Follow these precautions to minimize risks:
- Turn off the power to the fixture at the circuit breaker or fuse box.
- Allow the fixture to cool completely before working on it.
- Wear gloves to protect your hands from sharp edges or broken glass.
- Use a ladder if the fixture is located high or difficult to reach.
Step-by-Step Instructions
Once you have gathered your materials and taken the necessary safety precautions, follow these steps to change the outdoor light fixture bulb:
- Remove the Fixture Cover: Locate the screws or clips holding the fixture cover in place and carefully remove them. Gently lift the cover off the fixture.
- Identify the Bulb Type: Determine the type of bulb used in the fixture by referring to the fixture's manual or the old bulb. Common outdoor light fixture bulbs include incandescent, LED, and CFL.
- Remove the Old Bulb: Gently grip the old bulb and twist it counterclockwise to loosen it. Do not pull on the wires.
- Insert the New Bulb: Align the threads of the new bulb with the socket and screw it in clockwise until it is snug. Avoid overtightening.
- Reattach the Fixture Cover: Place the fixture cover back in place and secure it with the screws or clips. Ensure that the gasket or seal is properly aligned to prevent moisture from entering.
- Turn on the Power: Restore power to the fixture at the circuit breaker or fuse box. Test the light fixture to ensure that the new bulb is working correctly.
Additional Tips
- If the fixture has multiple bulbs, replace all of them simultaneously to ensure even illumination.
- Use a wattage that is recommended for outdoor use and compatible with your fixture.
- Dispose of the old bulb properly at a designated recycling center.
Conclusion
Changing an outdoor light fixture bulb is a relatively straightforward task that can be completed in a few simple steps. By following these instructions, observing safety precautions, and using the appropriate materials, you can safely and effectively maintain the illumination of your outdoor spaces. Remember to check your outdoor light fixtures regularly to ensure that they are functioning properly and providing adequate lighting for your safety and security.

How To Change An Outdoor Porch Lantern Sconce Light Bulb Simple Diy Do It Yourself Procedure Hq

How To Change An Outdoor Porch Lantern Sconce Light Bulb Simple Diy Do It Yourself Procedure Hq

How To Change An Outside Light Bulb Quick And Easy

How To Change Porch Light Bulb

Can Anyone Help Me Open This Outdoor Wall Fixture To Change The Bulbs

Replacing An Outdoor Light Fixture

Altair Lighting Led Lantern And Driver Replacement Ledsupply Blog

3 Tips For Changing A Flood Light Bulb Doityourself Com

How To Replace An Outdoor Light Fixture

Installing Wyze Cam Outside One Approach Tips Tricks Forum
Related Posts
