How To Bypass a Photocell on an Outdoor Light
Outdoor lighting equipped with photocells offers automated illumination control, activating at dusk and deactivating at dawn. However, there are instances where bypassing the photocell becomes necessary, such as troubleshooting a malfunctioning sensor or implementing a different control system. This article outlines several methods for bypassing a photocell, emphasizing safety precautions and providing clear, step-by-step instructions.
Disclaimer: Working with electrical components carries inherent risks. If unfamiliar with electrical wiring, it is strongly recommended to consult a qualified electrician. Always ensure the power is disconnected before working on any electrical fixture.
Understanding the Photocell Mechanism
A photocell, also known as a photoresistor or light-dependent resistor (LDR), detects ambient light levels. As light diminishes, the resistance within the photocell increases, triggering the light fixture to turn on. Conversely, when light levels increase, the resistance decreases, turning the light off. Bypassing the photocell involves circumventing this light-dependent switching mechanism.
Method 1: Locating and Identifying the Photocell Wires
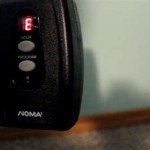
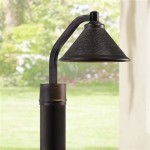
The photocell is typically located within a small dome or protrusion on the light fixture. It is connected by two wires, often identifiable by their colors (frequently red and black or red and white). Consult the manufacturer's wiring diagram if available. This diagram will provide precise wire identification and facilitate the bypass process safely and accurately.
Method 2: Bypassing Using Electrical Tape
Once the photocell wires are identified and the power is disconnected, carefully remove the wire connectors. Join the two wires previously connected to the photocell by twisting them together and securing the connection with electrical tape. This creates a continuous circuit, bypassing the photocell and allowing the light to operate continuously. This method is temporary and easily reversible.
Method 3: Bypassing Using Wire Nuts
For a more permanent bypass, wire nuts can be used. After disconnecting the power and identifying the photocell wires, twist the two wires together and secure the connection with a properly sized wire nut. This method is more secure than electrical tape and provides a more permanent solution. Ensure the wire nut is tightly fastened to prevent any loose connections.
Method 4: Bypassing at the Junction Box
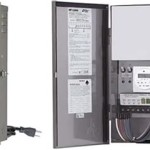
Sometimes, the photocell is located within the junction box rather than directly on the light fixture. Access the junction box, ensuring the power is off, and identify the photocell wires. Similar to the previous methods, connect the two wires together, either using electrical tape or a wire nut, to bypass the photocell. This method is useful when the photocell is not easily accessible on the fixture itself.
Method 5: Replacing the Photocell with a Shorting Cap
A shorting cap is a small cap specifically designed to bypass photocells. Disconnect the power and remove the wires from the photocell. Insert the wires into the shorting cap and secure it according to the manufacturer's instructions. This method provides a clean and professional bypass while maintaining the integrity of the wiring.
Important Safety Considerations
Safety should be the paramount concern when working with electrical components. Always adhere to the following safety guidelines:
- Disconnect the power: Turn off the circuit breaker supplying power to the light fixture before commencing any work.
- Use insulated tools: Employ insulated screwdrivers and wire strippers to prevent electrical shock.
- Double-check connections: Ensure all wire connections are secure and properly insulated to avoid short circuits.
- Consult a professional: If unsure about any aspect of the process, contact a qualified electrician for assistance.
Troubleshooting
If the light fixture does not function correctly after bypassing the photocell, several factors could be contributing to the issue. First, verify the power is restored to the circuit. Second, check all connections to ensure they are secure and correctly wired. If the problem persists, there may be a separate issue with the light fixture itself, such as a faulty bulb or internal wiring problem.
Maintaining Bypassed Outdoor Lighting
Once the photocell is bypassed, the light will remain on continuously. This can lead to increased energy consumption and potential bulb burnout. Consider using energy-efficient bulbs or implementing alternative control mechanisms, such as timers or motion sensors, to manage the lighting schedule effectively.

Bypass Photocell Doityourself Com Community Forums

Photocell Sensor Bypass Circuit Wiring Diagram

Photocell Sensor Bypass Circuit In Two Way Switch

Photocell Sensor Bypass Circuit Wiring Diagram

Nextgen Led Parking Lot Lights How To Bypass The Photocell

Photocell Sensor Bypass Circuit Daigram In Twoway Switch Wiring

Photocell Sensor Bypass Circuit Wiring Diagram

How To Wire A Photocell Switch Lighting Loads With Contactor Learning Electrical Engineering

Gbaysa 1pack Photocell Shorting Cap Twist Lock Photo Control Sensor Bypass For Street Lighting Com

Photocell Sensor Bypass Circuit In Two Way Switch
Related Posts