How To Attach An Outdoor Light Fixture
Installing an outdoor light fixture enhances safety, security, and curb appeal. This guide provides a comprehensive step-by-step process for attaching an outdoor light fixture, ensuring proper functionality and adherence to safety regulations.
1. Safety First: Disconnect Power
Before commencing any electrical work, safety is paramount. Turn off the power to the circuit that will supply the light fixture by switching off the corresponding breaker in the main electrical panel. Verify the power is off by testing the wires with a non-contact voltage tester at the junction box where the fixture will be installed.
2. Gather Necessary Tools and Materials
Having the correct tools and materials simplifies the installation process. Gather the following items: voltage tester, wire strippers, electrical tape, wire connectors, screwdriver, drill, appropriate drill bits (including masonry bits if needed), mounting hardware suitable for the fixture and wall material, and the new outdoor light fixture itself. Ensure the light fixture chosen has a weatherproof rating appropriate for the intended location.
3. Preparing the Junction Box
The junction box serves as the connection point between the electrical wiring and the light fixture. If an existing fixture is being replaced, carefully remove it, noting the wiring connections. If installing a new fixture, ensure a suitable weatherproof junction box is securely mounted to the wall. The box should be firmly attached and properly grounded. For new installations, running the electrical cable to the junction box may require professional assistance if you are not experienced with electrical wiring.
4. Connecting the Wires
Most outdoor light fixtures utilize three wires: black (hot), white (neutral), and green or bare copper (ground). Connect the wires from the fixture to the corresponding wires in the junction box using appropriate wire connectors. Match the black wire from the fixture to the black wire in the box, the white wire to the white wire, and the ground wire to the ground wire in the box or to a grounding screw within the box. Securely tighten the wire connectors and ensure no bare wire is exposed.
5. Mounting the Fixture
Once the wires are connected, carefully position the light fixture against the wall or mounting surface. Align the fixture's mounting holes with the junction box or mounting bracket. Secure the fixture using the provided mounting hardware. If installing on masonry, use appropriate masonry anchors and screws. Ensure the fixture is mounted securely and flush against the wall.
6. Sealing for Weather Protection
Outdoor light fixtures are exposed to the elements, necessitating proper sealing to prevent water ingress. Apply a bead of silicone sealant around the base of the fixture where it meets the wall. This creates a weatherproof barrier, protecting the electrical connections and preventing moisture damage.
7. Testing and Final Adjustments
After the sealant has cured, turn the power back on at the breaker. Test the light fixture to ensure it functions correctly. Make any necessary adjustments to the fixture's position or aim. If the light does not function, double-check the wiring connections and ensure the bulb is correctly installed. If the issue persists, consult a qualified electrician.
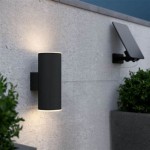
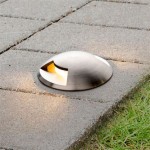
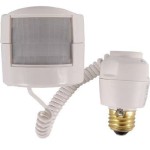
Choosing the Right Fixture and Location
Selecting the appropriate fixture and location is crucial for optimal lighting and aesthetic appeal. Consider the fixture's style, size, and light output relative to the surrounding area. Motion sensor lights enhance security, while decorative fixtures contribute to curb appeal. Choose locations providing adequate illumination for walkways, entryways, and other areas requiring nighttime visibility.
Working with Different Wall Materials
Different wall materials require specific mounting techniques. For wood siding, use wood screws appropriate for the fixture's weight. For stucco or brick, use masonry anchors and screws. Ensure the anchors are sized correctly for the material and the fixture's weight. For metal siding, use self-tapping screws designed for metal.
Understanding Electrical Codes
Adhering to local electrical codes is essential for safety and compliance. Consult local building codes and regulations regarding outdoor lighting installations. These codes may dictate specific wiring methods, junction box requirements, and grounding procedures. If unsure about any aspect of the installation, consult a qualified electrician.

Replacing An Outdoor Light Fixture

How To Replace An Outdoor Light

Replacing An Outdoor Light Fixture

How To Install An Exterior Electrical Box For A Light Fixture On The Wood Siding

How To Replace An Outdoor Light

How To Install Outdoor Wall Lighting Light Fixtures Mr Electric

How To Replace An Outdoor Light

Replacing An Outdoor Light Fixture

Replacing An Exterior Light Fixture

How To Install Outdoor Pendant Light Iron Gallery Llc Lights Web