How to Add a Photocell Outdoor Light
Outdoor lighting can add security, safety, and curb appeal to your home. Adding a photocell outdoor light is a great way to automate your outdoor lighting, making it easier to keep your home safe and well-lit.
Here is a step-by-step guide on how to add a photocell outdoor light:
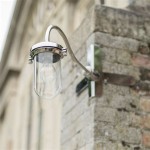
1. Choose the Right Light
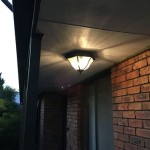
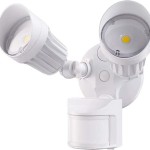
The first step is to choose the right outdoor light. There are many different types and styles of outdoor lights available, so it is important to choose one that will complement your home and meet your lighting needs.
When choosing a photocell outdoor light, it is important to consider the following factors:
* Brightness: The brightness of the light is measured in lumens. The higher the lumens, the brighter the light. * Color temperature: The color temperature of the light is measured in degrees Kelvin (K). The lower the Kelvin, the warmer the light. * Beam angle: The beam angle of the light is measured in degrees. The wider the beam angle, the more area the light will illuminate. * Motion sensor: Some photocell outdoor lights also have a motion sensor. This means that the light will only turn on when it detects motion.2. Install the Light Fixture
Once you have chosen the right light, you need to install the light fixture.
To install the light fixture, you will need the following tools:
* Screwdriver * Drill * Wire strippers * Electrical tapeFollow the manufacturer's instructions to install the light fixture.
3. Wire the Light
Once the light fixture is installed, you need to wire the light.
To wire the light, you will need the following supplies:
* Electrical wire * Wire nuts * Electrical tapeFollow the manufacturer's instructions to wire the light.
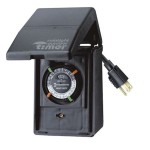
4. Install the Photocell
Once the light is wired, you need to install the photocell.
To install the photocell, you will need the following tools:
* Screwdriver * Drill * Wire strippers * Electrical tapeFollow the manufacturer's instructions to install the photocell.
5. Test the Light
Once the photocell is installed, you need to test the light.
To test the light, do the following:
* Turn on the power to the light. * Cover the photocell with your hand. * The light should turn on. * Remove your hand from the photocell. * The light should turn off.If the light does not work properly, check the following:
* Make sure that the light is wired correctly. * Make sure that the photocell is installed correctly. * Make sure that the power is turned on to the light.6. Enjoy Your New Light!
Once you have tested the light and it is working properly, you can enjoy your new outdoor light!
A photocell outdoor light is a great way to automate your outdoor lighting. By following these steps, you can easily add a photocell outdoor light to your home.

How To Add A Light Sensor Outdoor Lanterns The Navage Patch

Electrical Wiring From A Photocell To An Outdoor Led Floodlight Or Reflector 110v Devices

How To Install And Troubleshoot Photo Eye

Easy Install Automatic Light Sensor Switch Photocell Ldr For Lighting Wiring And Setup

Dusk To Dawn Photocell Switch Installation

Hardwire Post Eye Light Control With Photocell Automatic Sensor Switch Ledwholers

Steps To Follow Add Photocell In Outdoor Lights Ledmyplace

Installing A Photocell Sensor

How To Wire A Photocell Multiple Lights

Install The Photocell Sensor