How to Add an Outdoor Light Fixture: A Guide to Illuminating Your Outdoor Space
Transform your outdoor space with the radiant glow of an outdoor light fixture. Whether you're seeking to enhance the ambiance of your patio, illuminate a walkway, or provide security to your property, adding an outdoor light fixture is a simple yet impactful upgrade. Dive into this comprehensive guide to learn the essential steps involved in this illuminating project.
1. Choose the Right Fixture
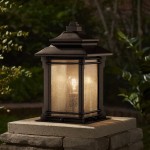
The choice of outdoor light fixture sets the tone for the atmosphere you wish to create. Consider the style of your home and outdoor décor, as well as the specific purpose of the light. Pendant lights add a touch of elegance, while wall lanterns provide ample illumination for walkways. Post lights are ideal for illuminating driveways and pathways, while recessed lights offer a sleek and subtle glow.
2. Determine the Location
Strategically place your outdoor light fixture to maximize its functionality and aesthetics. Measure the area to be illuminated and determine the optimal location for the light source. Consider factors such as the height of the fixture, the spread of light, and the proximity to other objects. Avoid obstructing walkways or doorways, and ensure there is sufficient clearance from plants or trees.
3. Prepare the Wiring
Before installing the light fixture, ensure you have the necessary wiring in place. If there is no existing wiring, you may need to hire an electrician to run new wires from the electrical panel to the desired location. Alternatively, you can opt for solar-powered light fixtures that require minimal wiring.
4. Mount the Fixture
Once the wiring is prepared, attach the mounting bracket or base of the light fixture to the chosen location. Use heavy-duty screws and ensure the fixture is securely fastened. Follow the manufacturer's instructions for the specific type of fixture you have selected.
5. Connect the Wiring
Carefully connect the wires from the fixture to the appropriate terminals on the switch or electrical box. Match the colored wires (black to black, white to white, and green or bare to ground) and secure the connections with wire nuts or electrical tape. Ensure all connections are tight and secure.
6. Install the Bulbs
Select the appropriate bulbs for your outdoor light fixture, considering factors such as wattage, color temperature, and lifespan. Install the bulbs according to the manufacturer's instructions and ensure they are securely in place.
7. Test the Fixture
Before completing the installation, switch on the power and test the light fixture to ensure it operates correctly. Inspect the fixture for any loose connections or flickering, and adjust the bulbs as necessary to achieve the desired level of illumination.
Additional Tips
- Consider adding a dimmer switch to your outdoor light fixture for adjustable lighting control.
- Use energy-efficient LED bulbs to save energy and extend the lifespan of your light fixture.
- Protect the light fixture from the elements with a weather-resistant finish or housing.
- Follow all electrical safety guidelines and local building codes when installing an outdoor light fixture.

How To Install An Outdoor Light Fixture The Right Way
Adding An Outdoor Light Diy Home Improvement Forum

How To Fit Outdoor Lights Lighting Electrical Security B Q

How To Add A Light Sensor Outdoor Lanterns The Navage Patch

How To Mount External Light Fixtures On Existing Stucco Ehow

Update Your Outdoor Lighting With This Easy Diy Light Makeover

How To Turn A Hard Wired Light Fixture Into Plug In The Happy Housie
How To Replace An Outdoor Light

How To Spray Paint Outdoor Light Fixtures True Value

How To Add Outdoor Lighting Your Landscaping Dig This Design
Related Posts
