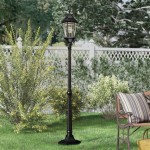
How Do You Wire Outdoor Lighting
Installing outdoor lighting can increase your home's curb appeal, safety, and security. However, it's essential to approach this project with caution and proper preparation. Here are some fundamental considerations for wiring outdoor lighting.
Materials Preparation
Before you begin, gather all the necessary materials: outdoor lighting fixtures, wiring (usually 12 or 14 gauge), wire connectors, electrical tape, a voltage tester, and possibly a transformer. Ensure that the fixtures are rated for outdoor use and have the appropriate IP rating for your climate.
Safety First
Always prioritize safety when working with electricity. Turn off the power to the area where you'll be working from the main electrical panel. Test the wires with a voltage tester to ensure they are not live. Wear gloves and eye protection as necessary.
Choose the Right Transformer
If your outdoor lighting operates on low voltage, you'll need a transformer to reduce the voltage from 120 volts to 12 or 24 volts. Choose a transformer with adequate wattage to handle the total wattage of your lighting fixtures.
Run the Wires
Plan the layout of your outdoor lighting and determine where you'll run the wires. Bury the wires underground, using conduit for protection from damage. Make sure to leave enough slack in the wires to allow for future maintenance or adjustments.
Connect the Fixtures
Follow the manufacturer's instructions for connecting the lighting fixtures to the wires. Use waterproof connectors and electrical tape to ensure a secure and weatherproof connection. Test each fixture before fully securing it.
Connect to Power
Once all the fixtures are connected, run the wires back to the power source. Connect them to an outdoor-rated electrical outlet or junction box. If using a transformer, connect it to the power source and the lighting wires.
Final Checks
Before powering on the lighting, use a voltage tester to verify that the connections are correct and there are no shorts. Restore power to the area and test the lighting system. Make any necessary adjustments or troubleshooting as required.
Tips
Consider using motion sensors to automatically turn on lights when movement is detected. Use dimmers to control the brightness of your lighting. Choose fixtures that complement the style of your home and outdoor decor. Regular maintenance and cleaning will help extend the lifespan of your outdoor lighting.
Wiring outdoor lighting can be a rewarding project, enhancing the aesthetic appeal and safety of your outdoor spaces. By following these essential steps and prioritizing safety, you can ensure a successful installation.

Wiring Installation Coastal Source

Outdoor Low Voltage Lighting Diy Family Handyman

How To Install Low Voltage Outdoor Landscape Lighting The Garden Glove

How To Wire Outdoor Low Voltage Lighting Part 2

How To Wire Outdoor Low Voltage Lighting Part 3

The Easiest Way To Install Low Voltage Landscape Lighting Abby Organizes

How To Install Low Voltage Outdoor Landscape Lighting The Garden Glove

Choosing Low Voltage Lighting Transformers Cable And Wire Connectors In Lite Outdoor

How To Install Outdoor Lighting And Home Electrical Wiring Diy

Low Voltage System Layout Landscape Lighting Supply Company


