How to Set an Intermatic Outdoor Light Timer
Outdoor lighting enhances security and curb appeal, but managing it manually can be inconvenient. Intermatic timers provide a solution by automating outdoor lighting schedules. This article offers a comprehensive guide on setting various Intermatic outdoor light timers, empowering users to optimize their lighting control.
Understanding Intermatic Timer Types
Intermatic offers a range of timers designed for various applications. Understanding the specific timer model is crucial for proper setup. Common types include mechanical timers, digital timers, and timers integrated with astronomical clocks. Each type offers different levels of programming complexity and functionality.
Preparing for Timer Installation
Before setting the timer, gather the necessary tools and materials. Typically, this includes a screwdriver, wire strippers (if connecting directly to wiring), and the timer's instruction manual. Ensure the power supply to the lighting fixture is turned off at the breaker box for safety. This precaution prevents electrical shock during the installation process.
Setting a Mechanical Intermatic Timer
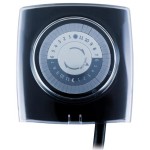
Mechanical timers utilize a rotating dial with segmented pins or levers to control the on/off cycles. These timers are generally straightforward to operate. The following steps outline the basic setup:
1.
Set the Current Time:
Rotate the dial clockwise until the current time aligns with the indicator mark. Avoid forcing the dial past its stopping point.2.
Setting ON/OFF Times:
Press the pins or flip the levers outwards for the periods when the lights should be on. Each pin or lever typically represents a 15-minute or 30-minute interval. Ensure the pins are fully extended for accurate timing.3.
Connecting the Timer:
Wire the timer according to the instructions provided in the manual. Typically, this involves connecting the hot wire from the power source to the "Line" terminal and the hot wire leading to the light fixture to the "Load" terminal.Setting a Digital Intermatic Timer
Digital timers offer greater programming flexibility and precision compared to mechanical timers. They utilize digital displays and buttons for setting schedules.
1.
Setting the Current Time and Day:
Use the designated buttons to input the current time and day of the week. Consult the manual for the specific button sequence for your model.2.
Programming ON/OFF Times:
Navigate through the programming menu to set the desired on and off times. Digital timers often allow for multiple on/off cycles per day and different schedules for different days of the week.3.
Setting the Timer Mode:
Select the appropriate timer mode. Common modes include "Auto" for following the programmed schedule, "On" to keep the lights permanently on, and "Off" to keep the lights permanently off.4.
Connecting the Timer:
Wire the timer according to the wiring diagram in the manual. Pay close attention to the labeling of terminals, such as "Line," "Load," and "Neutral."Setting an Intermatic Timer with an Astronomical Clock
Timers with astronomical clocks automatically adjust the lighting schedule based on sunrise and sunset times. This eliminates the need for manual adjustments throughout the year.
1.
Setting the Location:
Input the latitude and longitude of the installation location. This information allows the timer to calculate accurate sunrise and sunset times.2.
Setting the Offset:
Adjust the offset to control how long before or after sunrise/sunset the lights turn on or off. For example, setting a -30 minute offset for "on" will activate the lights 30 minutes before sunset.3.
Connecting the Timer:
Follow the wiring instructions provided with the timer to connect it to the power source and the lighting fixture.Troubleshooting Common Issues
If the timer isn't functioning correctly, consider the following troubleshooting steps:
1.
Check the Power Supply:
Ensure the circuit breaker supplying power to the timer is turned on. Verify that the power outlet is working correctly if using a plug-in timer.2.
Verify Wiring:
Double-check the wiring connections to ensure they are secure and correctly connected to the appropriate terminals.3.
Consult the Manual:
Refer to the troubleshooting section of the timer's manual for specific guidance related to your model.4.
Test the Light Fixture:
Bypass the timer temporarily to confirm that the light fixture itself is functioning properly.Maintaining Your Intermatic Timer
Regular maintenance can prolong the lifespan of your Intermatic timer.
1.
Periodic Inspection:
Visually inspect the timer for any signs of damage or wear. Check for loose wiring or connections.2.
Cleaning:
Clean the timer's exterior using a soft, dry cloth. Avoid using harsh chemicals or abrasive cleaners.3.
Battery Replacement (for digital timers):
Replace the backup battery in digital timers as needed. This ensures the programmed schedule is retained during power outages.Safety Precautions
Always prioritize safety when working with electrical devices. Follow these essential precautions:
1.
Disconnect Power:
Turn off the power at the breaker box before installing or servicing the timer.2.
Dry Conditions:
Ensure your hands and the work area are dry to prevent electrical shock.3.
Professional Assistance:
If unsure about any aspect of the installation process, consult a qualified electrician.
Intermatic Timer

How To Program The Hb31k Outdoor Plug In Timer From Intermatic

Intermatic Hb880r Landscape Lighting Timer Tutorial

How To Program The Intermatic Hb880r Outdoor Plug In Timer

How To Use An Intermatic Heavy Duty Electrical Timer

How To Program An Intermatic Heavy Duty Outside Light Timer

How To Adjust Your Timer For Daylight Savings Spring Lexington Outdoor Lighting

Intermatic Dt620 Landscape Lighting Timer Tutorial And Review

Hb880r Outdoor Plug In Timer By Intermatic Marvel Lighting

Intermatic P1121 Heavy Duty Outdoor Timer 15 Amp With Extra Replacement Tripper 2 Red Green Com
Related Posts
