How Do I Set the Time on My Outdoor Light Timer?
It's dusk, and you're dashing out the door to turn on your outdoor lights. Wouldn't it be more convenient if they could just turn on automatically? Achieving this convenience is simpler than you think. With an outdoor light timer, you can set a specific time for your lights to illuminate and extinguish, allowing you to create a welcoming outdoor space without lifting a finger. To get started, follow this step-by-step guide on setting the time on your outdoor light timer:
Step 1: Understand Your Timer Type
Outdoor light timers come in various types, so it's essential to identify which type you have. Some common types include:
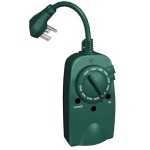
- Mechanical timers: Operated by rotating a dial to set the on/off times.
- Digital timers: Utilize electronic displays and buttons to set the time and other options.
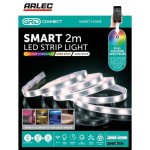
- Smart timers: Connect to your home Wi-Fi network and can be controlled remotely through an app.
Step 2: Locate the Time Adjustment Feature
Once you know your timer type, it's time to find the time adjustment feature. On mechanical timers, this is usually a dial with hourly increments. Digital and smart timers typically have buttons or dials dedicated to setting the time.
Step 3: Set the Current Time
Begin by setting the current time on your timer. Ensure that the timer display matches the actual time, taking into account any daylight saving time adjustments if applicable.
Step 4: Set the On/Off Times
Next, determine when you want your lights to turn on and off. On mechanical timers, identify the pins or tabs that represent each hour. Push in or pull out the pins at the desired on/off times. For digital and smart timers, use the buttons or dials to set the specific hours and minutes.
Step 5: Repeat for Additional Timers (if necessary)
If you have multiple outdoor light timers, repeat the time-setting process for each one. Ensure each timer has the correct on/off times to avoid any discrepancies in your outdoor lighting schedule.
Step 6: Plug in and Test
Once the timers are set, plug them into a power outlet and connect your lights. Observe the lights to ensure they turn on and off at the designated times.
Additional Tips:
- Choose the right location: Place the timer in a weather-resistant enclosure to protect it from the elements.
- Consider photocell timers: These timers automatically adjust lighting based on ambient light levels, ensuring lights are only on when needed.
- Use timers for security: Program lights to turn on at dusk and off at dawn to deter potential intruders.
- Experiment with different settings: Adjust the on/off times based on季節or personal preferences.
Setting the time on your outdoor light timer is an easy and effective way to automate your outdoor lighting. By following these steps and utilizing the additional tips, you can create a well-lit outdoor space that enhances both convenience and safety.

How To Set A Plug Timer Mechanical Digital Switches

How To Use A Timer Switch For Lights

How To Set A Light Timer The Home Depot

How To Use A Timer Switch For Lights

How To Set A Light Timer The Home Depot

How To Put Outdoor Lights On A Timer Electronicshub

3 Easy Automatic Porch Light Timers

How To Use A Timer Switch For Lights

3 Easy Ways To Use A Light Timer Wikihow

How To Set The Start And Stop Times An Outdoor Light Timer


