Hampton Bay Outdoor Light Timer Instructions
Outdoor lighting enhances the beauty and security of any home. Hampton Bay offers a variety of outdoor light timers to automate this process, providing convenience and energy efficiency. This article provides comprehensive instructions for setting up and using these timers, ensuring users can maximize their benefits.
1. Initial Setup and Installation
Before beginning, ensure the main power supply to the outdoor light fixture is turned off. This crucial safety step prevents electrical shock. Locate the existing outdoor light fixture's wiring, typically consisting of two wires: a black (hot) wire and a white (neutral) wire. Additionally, there may be a green or bare copper (ground) wire. The Hampton Bay timer will be wired in between the power supply and the light fixture.
Carefully connect the wires from the power supply to the corresponding terminals on the timer, typically marked "Line" or "Input." Then, connect the wires from the light fixture to the timer's "Load" or "Output" terminals. Ensure each wire connection is secure and properly tightened to prevent loose connections. If a ground wire is present, connect it to the timer's ground terminal, often marked with a green screw or a ground symbol.
Once the wiring is complete, carefully tuck the wires into the timer's housing and mount the timer to the wall or junction box. Ensure the timer is securely fastened and weatherproofed according to the manufacturer's instructions. Different models may have specific mounting requirements, so consulting the provided manual is essential.
2. Setting the Current Time and Day
After installation, the timer needs to be programmed with the current time and day. This is typically done using buttons or dials on the timer's face. Locate the "Clock" or "Time" button and press it to enter the time setting mode. Use the up and down buttons (or turn the dial) to adjust the hours and minutes. Some timers also include an AM/PM indicator that needs to be set correctly.
Next, locate the "Day" or "Weekday" button. Press it to select the current day of the week. Most timers use abbreviations for the days, such as "SUN," "MON," "TUE," etc. Ensure the correct day is selected for accurate scheduling.
Hampton Bay offers a range of timer models, including digital and analog versions. Digital timers typically use a digital display and buttons for programming, while analog timers utilize dials and pins for setting on/off times. Refer to the specific instructions for your model for detailed navigation.
3. Programming On/Off Times
The core function of the timer is to automate the switching of the outdoor light. This involves setting specific on and off times. Locate the "On" and "Off" buttons or programming pins. Depending on the model, you might have various options for setting schedules, including daily, weekly, or weekend/weekday schedules.
For daily schedules, simply set the desired on and off times for each day. For example, you might program the light to turn on at sunset and off at sunrise. More advanced timers allow for different schedules for weekdays and weekends. This is useful for accommodating different routines and conserving energy.
Some Hampton Bay timers incorporate features like "random" or "vacation" modes. The "random" mode turns the lights on and off at slightly varied times to simulate occupancy when the homeowner is away. The "vacation" mode allows for setting a specific on/off schedule for a designated period. These features enhance security and convenience.
If the timer utilizes programming pins, carefully position the pins according to the desired on and off times, referring to the markings on the timer dial. For digital timers, use the up and down buttons to adjust the on and off times in the designated program slots.
After programming, it is recommended to test the timer functionality to ensure it operates as intended. Observe the light fixture at the programmed on and off times to verify correct operation. If necessary, adjust the settings accordingly.
Regularly check the timer's operation and settings, especially after power outages or seasonal time changes. Adjust the clock and day settings as needed to maintain accurate scheduling. Consult the user manual for specific instructions related to your timer model. Proper maintenance ensures optimal performance and longevity of the Hampton Bay outdoor light timer.

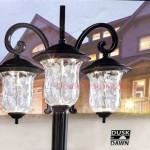
Hampton Bay Low Voltage 200 Watt Landscape Lighting Transformer With Dusk To Dawn Sensor Sl 12a The Home Depot

How To Setup Programing Trouble Shooting The Hampton Bay Low Voltage Lanscape Transformer

Hampton Bay Low Voltage 60 Watt Landscape Lighting Transformer With Dusk To Dawn Sensor Sl 12 Sv The Home Depot

Hampton Bay Low Voltage 600 Watt Landscape Transformer Diy 600ps The Home Depot

Hampton Bay Low Voltage 45 Watt Landscape Lighting Transformer With Dusk To Dawn Sensor Sl 12a The Home Depot

Hampton Bay Low Voltage 600 Watt Landscape Transformer Diy 600ps The Home Depot

Hampton Bay Low Voltage 120 Watt Landscape Lighting Transformer With Dusk To Dawn Sensor Sl 12a The Home Depot

Hampton Bay Low Voltage 300 Watt Landscape Transformer With Manual Ceiling Fans Lighting

Hampton Bay Alexandria 180Â White Motion Sensing Outdoor Decorative Lamp Manual Ceiling Fans Lighting

How To Setup Programing Trouble Shooting The Hampton Bay Low Voltage Lanscape Transformer