Essential Aspects of Electrical Wiring For Outdoor Lights
Having outdoor lights is an excellent way to enhance your home's security and curb appeal. However, it's important to ensure that the lights are wired properly to prevent any electrical hazards or damage to your property. Here are some essential aspects to consider when wiring outdoor lights.
1. Choose the Right Wire:
Use outdoor-rated wire specifically designed to withstand harsh weather conditions such as rain, sunlight, and extreme temperatures. UF (Underground Feeder) wire or direct burial wire is commonly used for outdoor lighting, as it is moisture-resistant and can be buried underground without conduit.
2. Determine the Circuit:
Outdoor lights should be connected to a dedicated circuit with its own circuit breaker or fuse. This ensures that the lights have their own power source and do not overload an existing circuit. The circuit should be rated for the total wattage of the lights and any other electrical devices connected to it.
3. Use Conduit:
Conduit is a protective casing that encloses the electrical wiring. It provides additional safety and protection against physical damage, moisture, and pests. PVC conduit is commonly used for outdoor applications due to its durability and resistance to corrosion.
4. Grounding:
Proper grounding is crucial for electrical safety. Grounding provides a path for any electrical faults to flow safely into the earth, preventing shocks or damage to equipment. All outdoor light fixtures should be properly grounded by connecting them to a grounded wire in the circuit.
5. Proper Splicing:
If you need to splice wires, use waterproof wire connectors or heat shrink tubing to create moisture-resistant connections. Ensure the splices are securely made and insulated properly to prevent any electrical shorts or failures.
6. Use Weatherproof Fixtures:
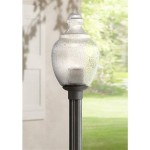
All outdoor light fixtures should be rated for outdoor use and have a weatherproof rating, such as IP65 or higher. This rating indicates the fixture's ability to withstand dust and water intrusion, ensuring its durability and safety in outdoor environments.
7. Consider Lighting Control:
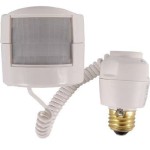
For convenience and energy efficiency, consider adding lighting control devices such as timers, motion sensors, or photocells. Timers allow you to set specific times for the lights to turn on and off automatically. Motion sensors activate the lights only when they detect movement, providing additional security and saving energy. Photocells use light-sensitive technology to automatically adjust the lights based on ambient light levels.
Conclusion:
By following these essential aspects, you can ensure that your outdoor lights are wired safely and properly. Remember to use outdoor-rated wire, conduit, and weatherproof fixtures, and pay attention to grounding and proper splicing techniques. If you are unsure about any aspect of electrical wiring, it is always advisable to consult a qualified electrician for professional assistance.

Zenith Motion Sensor Wiring Diagram Outside Lights To Handyman Wire Home Electrical

Outdoor Low Voltage Lighting Diy Family Handyman

How To Install A Yard Light Post Electrical Projects Home Wiring Lights

How To Install Outdoor Lighting And Diy Home Electrical Wiring

Diagrams Digramssample Diagramimages Wiringdiagramsample Wiringdiagram Check More At H Led Outdoor Lighting Security Lights Light Fixtures

How To Install Outdoor Lighting And Home Electrical Wiring Diy

How To Install Outdoor Lighting And Solar Lights Garden

Light Switch Wiring Diagram Home Electrical

Outdoor Lighting Basic Troubleshooting Tips Lanai Lights

Replacing An Outdoor Light Fixture
Related Posts

