Easy Set Outdoor Digital Timer Instructions
Outdoor digital timers offer a convenient way to automate outdoor lighting and appliances. Their programmable features allow users to set specific on/off times, saving energy and enhancing security. This article provides a comprehensive guide to setting up and operating a typical easy-set outdoor digital timer.
Before beginning the setup process, it is crucial to gather the necessary materials. Typically, this includes the digital timer itself, the instruction manual (always consult the specific manual provided with your timer), and any necessary tools, such as a small screwdriver for terminal connections.
The first step involves preparing the timer for programming. Locate the battery compartment, usually on the back or side of the unit. Insert the required batteries, ensuring correct polarity as indicated within the compartment. Most timers utilize AA or AAA batteries. Once the batteries are installed, the timer’s display should illuminate, indicating power.
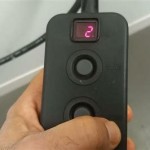
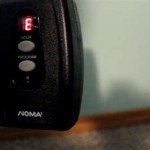
Next, users need to familiarize themselves with the timer's interface. This typically includes several buttons: a "Clock" button for setting the current time, a "Timer" or "Program" button for setting on/off schedules, a "Day" button for selecting specific days of the week, an "On/Off" button for manual override, and a "Reset" button for clearing all settings. Some timers may include additional buttons for specific functions, such as "Random" for security lighting or "Dusk/Dawn" for automated lighting based on ambient light levels.
Setting the current time is essential for accurate timer operation. Press the "Clock" button and use the designated arrow buttons (typically up and down) to adjust the hours and minutes. Some timers use a "AM/PM" button to toggle between morning and afternoon. Consult the manual for specific button functions related to your timer model.
Once the current time is set, programming the on/off schedules can begin. Press the "Timer" or "Program" button. The display will typically show "On-1," indicating the first on-time setting. Use the arrow buttons to set the desired on time, followed by pressing the "Timer" or "Program" button again to move to the "Off-1" setting. Repeat the process for the off time. Most timers allow for multiple on/off programs per day, so users can repeat this process for "On-2," "Off-2," and so forth, depending on the timer's capabilities.
Many digital timers offer the flexibility of weekday/weekend programming. Using the "Day" button, users can specify the days on which a particular program should run. Options typically include individual days (Monday, Tuesday, etc.), weekdays (Monday-Friday), weekends (Saturday-Sunday), or all days (Monday-Sunday). This allows for customized schedules to suit individual needs.
The "Manual On/Off" override is a useful feature for temporarily bypassing the programmed schedule. Pressing the "On/Off" button will typically toggle the connected device's power state, regardless of the programmed schedule. This is convenient for situations where immediate control is required. Note that depending on the timer model, the manual override might either be temporary or require further action to resume the programmed schedule.
The "Reset" button offers a way to clear all current settings and return the timer to its default state. This can be helpful when troubleshooting issues or when starting the programming process from scratch. Exercise caution when using the reset function, as it will erase all previously entered data.
After programming the timer, it's essential to connect it to the desired outdoor device. Ensure the power source to the device is turned off for safety. The timer typically has two output terminals: "Load" and "Line." The "Line" terminal connects to the power source, and the "Load" terminal connects to the device being controlled. Use the appropriate wiring techniques, ensuring secure connections. Consult the timer's manual for specific wiring diagrams and guidelines.
Once the connections are secure, turn the power back on to the circuit. The timer should now operate according to the programmed schedule. Observe the connected device to verify its operation aligns with the programmed settings. If any discrepancies occur, review the timer's manual and recheck the programming steps.
Choosing the right location for the timer is also crucial. Outdoor timers should be placed in a weatherproof location, protected from direct sunlight, rain, and excessive moisture. Consider using a weatherproof cover if necessary. The location should also provide easy access for programming and adjustments.
Maintaining the timer involves periodic checks of the battery level. Low batteries can affect the timer's accuracy and performance. Replace batteries as needed, following the manufacturer's recommendations. Additionally, keep the timer clean and free of debris to ensure proper operation and prolong its lifespan.
By following these instructions and consulting the specific manual provided with your timer, users can effectively utilize outdoor digital timers to automate their outdoor lighting and appliances, enhancing convenience, security, and energy efficiency.

2 Ez Set 24hr Digital Outdoor Timer Prime Wire Cable Inc

2 Ez Set 24hr Digital Outdoor Timer Prime Wire Cable Inc

Mytouchsmart 36027 Instruction Manual

Mytouchsmart 15 Amps 125 Volt Simple Set Outdoor Digital Timer 2 Plug In Countdown Lighting The Timers Department At Com

Mytouchsmart 36027 Instruction Manual

Mytouchsmart Simple Set Plug In Dual Digital Indoor Outdoor Timer With 2 Grounded S 26898 P2 The Home Depot

Mytouchsmart Indoor Outdoor Plug In Simple Digital Timer Black

54851 Manuals Datasheets Instructions

Outdoor Digital Timer How To Set Up The Programs

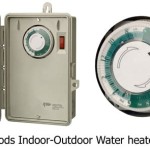
Easy Set Indoor Outdoor Swing Door Timer Orbit Irrigation
Related Posts