Essential Aspects of Do-It-Yourself Outdoor Lighting Kits
Transforming your outdoor space into an illuminated haven can be a rewarding endeavor with the help of do-it-yourself (DIY) outdoor lighting kits. These comprehensive packages provide all the components you need to create a mesmerizing ambiance in your backyard, patio, or garden. However, selecting the right kit and installing it effectively requires careful consideration of several key aspects.
Types of Outdoor Lighting Kits
DIY outdoor lighting kits come in various types to cater to specific lighting needs. Here are a few common options:
- Solar-powered kits: These kits harness the sun's energy to charge batteries that power the lights. They are eco-friendly and require minimal maintenance.
- Low-voltage kits: These kits use a transformer to convert household voltage to a lower voltage, making them safe for outdoor use.
- Plug-and-play kits: These pre-wired kits are designed for easy installation by simply plugging them into an outdoor outlet.
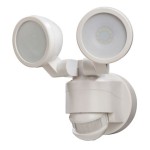
- Motion-sensor kits: These kits activate lights upon detecting movement, providing security and convenience.
Choosing the Right Kit
When selecting a DIY outdoor lighting kit, consider your specific needs and the size of the area you wish to illuminate. Here are some factors to keep in mind:
- Brightness: Measure the area you intend to light and determine the total lumens required for adequate brightness.
- Color temperature: Warm white light creates a cozy ambiance, while cool white light provides brighter illumination.
- Beam angle: Different beam angles affect the spread of light. Wider angles illuminate larger areas, while narrower angles focus light on specific objects.
- Fixtures: Choose fixtures that complement the style of your outdoor decor and provide the desired lighting effect.
Installation Considerations
Proper installation is crucial for safety and optimal performance. Follow these guidelines:
- Safety first: Always turn off the power before working on electrical connections.
- Plan the layout: Determine the placement of fixtures and wires before starting the installation.
- Trenching (for low-voltage kits): Dig trenches for the wires, ensuring they are deep enough to prevent damage.
- Wire connections: Use waterproof connectors and tape to secure all electrical connections.
- Mounting fixtures: Follow the manufacturer's instructions for mounting fixtures securely.
Maintenance and Troubleshooting
Regular maintenance and troubleshooting can extend the lifespan of your outdoor lighting and ensure its functionality. Here are some tips:
- Clean fixtures: Clean fixtures periodically to remove dirt and debris that can affect performance.
- Check bulbs: Replace burned-out bulbs promptly to maintain optimal brightness.
- Test motion sensors: Regularly test motion sensors to ensure they are functioning properly.
- Inspect wires: Periodically check wires for any damage or corrosion.
Conclusion
DIY outdoor lighting kits empower you to enhance the beauty and functionality of your outdoor space. By considering the types of kits, choosing the right one for your needs, installing it properly, and maintaining it regularly, you can create a captivating and inviting ambiance that will bring joy and convenience to your outdoor experiences.

Diy Backyard String Lights Taryn Whiteaker Designs

The 3 Best Smart Outdoor Lights For Backyards Of 2024 Reviews By Wirecutter

28 Backyard Lighting Ideas How To Hang Outdoor String Lights

19 Stylish Outdoor Lighting Ideas The Best Patio

Diy Permanent Holiday Lights Kits Oelo

21 Best Outdoor Lighting Ideas Easy Patio

Benefits Of Volt Diy Landscape Lighting Kits

5 Best Outdoor Solar Lights Of 2024 Reviewed

Plug Shine 24 V Outdoor Light System For The Garden

Deck Lighting Ideas With Brilliant Results Yard Envy
Related Posts
