DIY Posts for Hanging Outdoor String Lights
Hanging string lights outdoors is a great way to create a festive and inviting atmosphere for gatherings and celebrations. Whether you're hosting a party, enjoying a romantic evening, or simply want to enhance the ambiance of your outdoor space, string lights can make all the difference. However, installing string lights effectively requires proper support, and DIY posts provide an excellent solution.
Choosing the Right Materials
The first step is selecting the materials for your DIY posts. The most suitable choice for outdoor applications is pressure-treated lumber, which is resistant to rot and decay. You can use 4x4 or 6x6 posts, depending on the height and weight of the lights you plan to hang. For the base, you can use concrete or heavy-duty ground anchors, which will provide a secure foundation for the posts.
Determining the Post Height and Spacing
The height and spacing of the posts are crucial factors that will affect the overall look and functionality of your string lights. The optimal height will depend on the desired ambiance, but as a general rule, taller posts are suitable for larger areas or when you want to create a more dramatic effect. The spacing between the posts should be consistent to ensure even distribution of the lights.
Installing the Posts
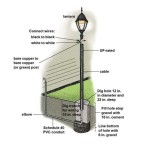
To install the posts, you will need to dig holes in the ground deep enough to accommodate the lower portion of the posts. The depth of the holes will vary depending on the height of the posts and the type of soil. After digging the holes, place the base (concrete or anchors) at the bottom and insert the posts. Use a level to ensure that the posts are straight and plumb. Fill the holes with concrete or secure the anchors as per the manufacturer's instructions.
Attaching the Crossbars
Once the posts are installed, you can attach crossbars to them to support the string lights. The crossbars can be made from the same pressure-treated lumber as the posts or from other materials such as metal or PVC. The length of the crossbars will depend on the spacing between the posts. Secure the crossbars to the posts using galvanized bolts or screws, ensuring they are level and parallel to each other.
Hanging the String Lights
With the posts and crossbars in place, you can now hang the string lights. Begin by connecting the lights to the power source and unraveling them along the crossbars. Use clips, hooks, or zip ties to secure the lights to the crossbars at regular intervals. Ensure that the lights are taut but not overly stretched, as this can damage them over time. Adjust the lights as necessary to achieve the desired coverage and illumination.
Additional Tips
Here are a few additional tips to enhance your DIY outdoor string light installation:
- Use waterproof string lights specifically designed for outdoor use.
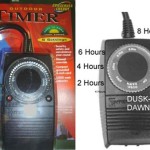
- Consider using a timer to automatically turn on and off the lights.
- Add a touch of extra ambiance with soft, diffused lighting by using Edison bulbs or frosted globes.
- For added stability, especially in windy conditions, you can install guy wires or cables from the posts to the ground.
- Enjoy the festive and inviting atmosphere created by your outdoor string lights!

Diy Patio Arbor Using String Lights The Honeycomb Home

How To Hang Outdoor String Lights From Diy Posts

Diy Backyard String Lights Taryn Whiteaker Designs

Diy String Light Planter Posts Momhomeguide Com

Diy Planter Posts For String Lights

Diy Posts For Outdoor String Lights Easy Backyard Project

Diy Planter Posts For String Lights

Easy Patio Planter Posts For String Lights Momhomeguide Com

Diy Planter Posts For String Lights Backyard Patio Ideas Sugar Maple Notes

28 Backyard Lighting Ideas How To Hang Outdoor String Lights

