Building Your Own Outdoor Propane Fire Pit: A Step-by-Step Guide
A propane fire pit offers an excellent way to enjoy the ambiance of an open flame within your backyard without the hassle of firewood. Building your own propane fire pit allows you to customize the design to your liking, making it a unique addition to your outdoor space. This guide will provide a step-by-step process for creating a functional and aesthetically pleasing propane fire pit.
Selecting Materials and Tools
The first step is to gather the necessary materials and tools. Here is a list of common items you will need:
- Fire pit base: This can be made from a variety of materials like concrete, stone, or metal. Consider the size and weight you want for your fire pit.
- Propane tank holder: This component acts as a safe and secure container for the propane tank.
- Propane burner: This is the heart of your fire pit, responsible for distributing the flame.
- Fire pit ring: This component surrounds the burner, preventing wind from interfering with the flame.
- Propane hose: This connects the tank to the burner, allowing gas to flow freely.
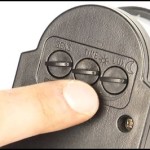
- Safety valve: This crucial component shuts off the flow of propane in case of an emergency.
- Sand and gravel: These materials are used for leveling the base and ensuring stability.
- Tools: You will need basic tools like a shovel, level, wrench, drill, tape measure, and safety glasses.
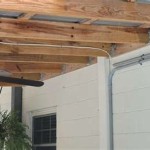
Constructing the Fire Pit Base
The construction of the base depends on the chosen material. For a concrete base:
- Prepare the Area: Clear the area where you intend to place the fire pit and mark out the desired size.
- Dig the Foundation: Dig a hole approximately 6-8 inches deep. The size should accommodate the dimensions of your chosen fire pit base.
- Level the Foundation: Use a level to ensure that the excavation is perfectly flat. This is crucial for a stable fire pit.
- Place Gravel: Fill the hole with about 2-3 inches of gravel for drainage and stability.
- Pour Concrete: Carefully pour the concrete mix into the prepared foundation, ensuring it evenly fills the space. Level the surface to create a flat and smooth base.
- Allow to Cure: Allow the concrete to cure completely according to manufacturer instructions, typically for 24-48 hours.
For other base materials like stone or metal, simply assemble the components according to the manufacturer's instructions or a design plan.
Installing the Propane Burner and Tank Holder
Once the base is completed, the next step is to install the burner and tank holder:
- Position the Burner: Place the propane burner on the center of the fire pit base. Ensure it is level and centered.
- Secure the Burner: Use the provided bolts or screws to securely fasten the burner to the base.
- Install the Tank Holder: Mount the propane tank holder in a designated area, either on the base or alongside it. Make sure it is positioned for easy access to the tank valve.
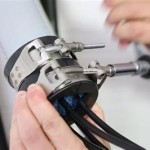
Connecting the Propane Hose, Safety Valve, and Fire Pit Ring
The final step involves connecting the propane hose, safety valve, and fire pit ring:
- Connect the Propane Hose: Attach one end of the propane hose to the propane tank valve and the other end to the burner. Tighten the connections securely.
- Install the Safety Valve: Connect the safety valve between the propane hose and the burner. This crucial component protects against accidental gas leaks and shut-off in case of an emergency.
- Place the Fire Pit Ring: Position the fire pit ring around the burner. The ring should be flush with the base and properly secured. It acts as a wind shield and prevents sparks from escaping.
Safety Considerations
Building a propane fire pit requires adherence to safety precautions. Here are some important considerations:
- Properly Seal All Connections: Ensure all connections between the propane tank, hose, valve, and burner are sealed properly.
- Regularly Inspect for Leaks: Conduct regular inspections for leaks by applying soapy water to connections. If bubbles appear, it indicates a leak, and you must address it immediately.
- Use Suitable Materials: Only use materials that are heat-resistant for the fire pit's construction.
- Maintain a Safe Distance: Keep a safe distance from the fire pit while it is in use. The flames can be intense and pose a burn risk.
- Avoid Flammable Materials: Keep flammable materials away from the fire pit.
- Never Leave Unattended: Never leave a propane fire pit unattended, especially when children or pets are present.
- Follow Manufacturer Instructions: Always refer to the manufacturer's instructions for specific safety precautions and operating procedures.

Diy Propane Fire Pit Starfire Direct

How To Build A Gas Fire Pit Woodlanddirect Com

How Do I Build A Diy Fire Pit For Natural Gas Starfire Direct

How To Build A Propane Fire Pit Using Gabion Baskets Diy Family Handyman

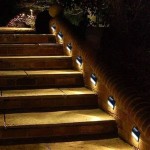
Fire Pit Ideas For Every Outdoor Space

Diy Outdoor Fire Table Hamilton Park Home

Diy Propane Fire Pit Outdoor Gas

Fire Pit Ideas For Every Outdoor Space

Diy Outdoor Fire Table Hamilton Park Home

How To Hide A Propane Tank From Your Patio S Fire Pit The Diy Playbook