DIY Outdoor Lighting Pole: A Comprehensive Guide to Illuminating Your Backyard Haven
Transform your outdoor space into a captivating oasis with a DIY outdoor lighting pole. These versatile structures enhance safety, ambiance, and aesthetics, providing illumination where you need it most. Creating your own lighting pole is an accessible and rewarding project that empowers you to customize the lighting of your backyard to perfection.
Essential Components of a DIY Outdoor Lighting Pole
The fundamental components of a DIY outdoor lighting pole include:
- Pole: The vertical support structure, typically made from metal, wood, or PVC.
- Base Plate: The foundation that anchors the pole securely to the ground.
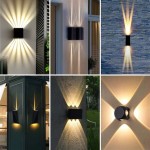
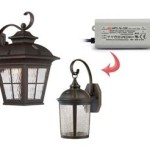
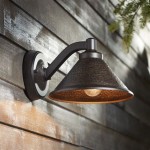
- Light Fixture: The illuminating element that emits light.
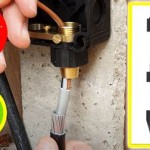
- Electrical Wiring: Conduits and cables that connect the light fixture to the power source.
Design Considerations for Your Pole
When designing your DIY outdoor lighting pole, consider the following factors:
- Purpose: Determine the intended function of the pole, such as path lighting, area illumination, or accent lighting.
- Height: Decide on the optimal height of the pole to achieve the desired level of illumination.
- Style: Choose a pole design that complements the aesthetics of your outdoor space.
Step-by-Step Guide to Building a DIY Outdoor Lighting Pole
Materials Required:
- Pole of desired material and height
- Base plate
- Light fixture
- Electrical wiring (conduit, cables, wire nuts)
- Mounting hardware (screws, bolts, nuts)
- Concrete mix
Instructions:
- Prepare the Base: Mark the desired location for the pole and dig a hole deep enough to accommodate the base plate. Fill the hole with concrete mix and place the base plate on top.
- Install the Pole: Once the concrete has cured, mount the pole onto the base plate using the provided hardware.
- Run the Electrical Wiring: Feed the electrical wiring through the pole and connect it to the light fixture according to the manufacturer's instructions.
- Mount the Light Fixture: Attach the light fixture to the top of the pole using the appropriate hardware.
- Connect to Power: Connect the electrical wiring to a power source, such as an outdoor outlet or circuit breaker.
- Test and Enjoy: Turn on the light fixture to ensure it is working properly and adjust the angle and direction of the light as needed.
Additional Considerations
- Safety First: Always follow electrical safety guidelines and consult a qualified electrician if necessary.
- Maintenance: Regularly inspect and clean your lighting pole to ensure optimal performance.
- Customization: Experiment with different light fixture designs and bulbs to create unique lighting effects.
By following these comprehensive guidelines, you can successfully create a DIY outdoor lighting pole that enhances the beauty and functionality of your backyard space. Enjoy the transformative power of customized illumination as you illuminate your outdoor oasis with style and efficiency.

Diy Outdoor Light Poles City Farmhouse By Jennifer O Brien

Diy Outdoor String Light Pole Stand Thistlewood Farm

Diy Outdoor String Light Poles

Diy Outdoor Lights Simple And Easy Ideas For Homes Craftionary

Diy Backyard String Lights Taryn Whiteaker Designs

Diy Outdoor String Light Pole Stand Thistlewood Farm

Pin On Birthday Party Ideas

Diy Backyard String Lights Taryn Whiteaker Designs

Diy Outdoor Light Poles Lighting Backyard

Poles For Outdoor Lights Today S Creative Life
Related Posts