Essential Aspects of DIY Low Voltage Outdoor Lighting Switch
DIY low voltage outdoor lighting switches are a crucial aspect of any outdoor lighting system, allowing you to control the illumination of your outdoor spaces with ease. These switches provide convenience, safety, and energy efficiency, but to ensure they function optimally, it's essential to consider their key aspects.
This article delves into the essential aspects of DIY low voltage outdoor lighting switches, including their types, features, wiring, installation, and maintenance. By understanding these aspects, you can make informed decisions and create an outdoor lighting system that meets your specific needs and enhances the ambiance of your outdoor spaces.
### Types of DIY Low Voltage Outdoor Lighting SwitchesDIY low voltage outdoor lighting switches come in various types, each offering unique features and functionality. Common types include:
- Single-Pole Switches: Control a single light fixture from one location.
- Three-Way Switches: Control a light fixture from two different locations.
- Dimmer Switches: Adjust the brightness of lighting fixtures, creating ambiance and energy savings.
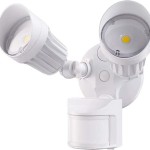
- Motion Sensor Switches: Automatically turn on lights when motion is detected, enhancing security and convenience.
When selecting a DIY low voltage outdoor lighting switch, several features should be considered to meet your specific needs:
- Amperage Rating: The maximum amount of current the switch can handle, ensuring it can power the connected light fixtures.
- Voltage Compatibility: The voltage of the lighting system, usually 12V or 24V, must match the switch's voltage rating.
- Weather Resistance: The switch should be rated for outdoor use to withstand weather elements such as rain, snow, and extreme temperatures.
- Mounting Options: The switch can be wall-mounted, post-mounted, or in-ground, depending on the installation location and aesthetic preferences.
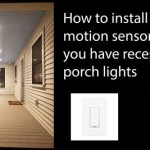
Proper wiring and installation are crucial for the safe and reliable operation of a DIY low voltage outdoor lighting switch. Follow these steps:
- Identify the power source and connect the wiring to the switch.
- Connect the lighting fixtures to the switch using low voltage cables.
- Mount the switch in the desired location according to the manufacturer's instructions.
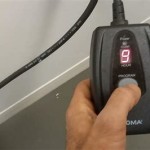
- Test the switch to ensure it operates correctly and controls the lighting fixtures.
Regular maintenance and troubleshooting can ensure the longevity and optimal performance of DIY low voltage outdoor lighting switches:
- Regular Cleaning: Clean the switch periodically to remove dust and debris.
- Loose Connections: Check for and tighten any loose connections to prevent malfunctions.
- Fuse Replacement: Replace blown fuses if the switch fails to function.
- Troubleshooting: Refer to the manufacturer's guide for troubleshooting specific issues with the switch.

How To Install Outdoor Lighting And Diy Family Handyman

Techmar Remote Receiver

Techmar Remote Receiver

Techmar Remote Receiver

How To Install Landscape Lighting The Home Depot

The 3 Best Smart Outdoor Lights For Backyards Of 2024 Reviews By Wirecutter

Techmar Smart Switch Plus Bluetooth

How To Install Landscape Lighting The Home Depot

How To Fit Outdoor Lights Lighting Electrical Security B Q

Techmar Dusk To Dawn Timer Sensor
Related Posts