Building an Outdoor Wood-Fired Stove: A Guide to DIY Warmth
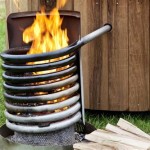
An outdoor wood-fired stove is a captivating addition to any outdoor space. Its rustic charm and functional warmth create an inviting ambiance perfect for cozy gatherings or outdoor cooking adventures. Constructing your own wood-fired stove is a rewarding project that fuses creativity with practical skills. This step-by-step guide will help you craft a durable and visually striking stove for your backyard retreat.
Step 1: Gather Materials
To build your outdoor wood-fired stove, you'll need the following materials:
- Firebricks: Choose high-quality firebricks rated for outdoor use.
- Mortar: Use a mortar specifically designed for masonry applications.
- Fireclay: This high-temperature sealant will enhance the durability of your stove.
- Metal Mesh: A piece of metal mesh will serve as the base of your stove.
- Metal Pipes: You'll need metal pipes for the chimney and flue.
- Sheet Metal: This will be used to create the outer shell of your stove.
- Insulation: Ceramic wool insulation or fire-resistant insulation boards will help maintain heat.
- Tools: Gather tools like a trowel, hammer, level, saw, and safety gear.
Step 2: Prepare the Foundation
Choose a level area in your yard for the stove. Clear the area of any debris and vegetation. Create a solid foundation using concrete blocks or a poured concrete slab to ensure stability.
Step 3: Build the Firebox
Construct the firebox using the firebricks and mortar. Lay the first layer of firebricks on the metal mesh, ensuring they are tightly fitted. Continue stacking the firebricks, bonding them with mortar, until you reach the desired height. Leave openings for the chimney and flue.
Step 4: Install the Chimney and Flue
Connect the metal pipes to create the chimney and flue. Secure them to the firebox using mortar. Make sure the chimney extends at least 3 feet above the top of the stove and has a rain cap to prevent water from entering.
Step 5: Create the Outer Shell
Cut the sheet metal to the desired dimensions for the outer shell. Bend and shape the metal sheets to form the sides and top of the stove. Attach the metal sheets to the firebox using screws or rivets.
Step 6: Add Insulation
Line the inner walls of the outer shell with ceramic wool insulation or fire-resistant insulation boards. This will help retain heat and prevent the metal from overheating.
Step 7: Apply Fireclay
Use fireclay to seal the joints between the firebricks, chimney, and flue. This will create a durable and airtight seal that will withstand high temperatures.
Step 8: Test and Enjoy
Once the mortar and fireclay have dried completely, you can test the stove. Start a small fire inside the firebox and let it burn for a while. Check for any smoke leaks or excessive heat radiating from the outer shell. Once you're satisfied, you can enjoy your outdoor wood-fired stove for warmth, cooking, or simply creating a cozy ambiance.
Building an outdoor wood-fired stove requires careful planning, precision, and safety precautions. Always follow local building codes and regulations. And remember, if you're unsure about any step of the process, it's best to consult a professional for guidance.

Plans How To Build A Wood Burning Outdoor Furnace Stove

How To Make An Outdoor Wood Burning Stove Fireplace B Vintage Style

How To Build An Outdoor Stove Ep 4 Howtospecialist Step By Diy Plans

Diy Rocket Stove For Your Outdoor Cooking Needs The Art Of Doing Stuff

How To Make A Wood Stove And Oven From Bricks Cement Diy Brick

How To Build Your Own Diy Outdoor Wood Stove Oven Cooker Grill And Smoker Icreatived

Build An Outdoor Wood Stove From Bricks And Cement Cooking Fireplace Diy

Build A 2 In 1 Outdoor Wood Stove With Brick Cement Diy

23 Diy Wood Stoves To Keep You Warm

Build A 2 In 1 Outdoor Wood Stove With Brick Cement Diy Kitchen Plans Decor
Related Posts
