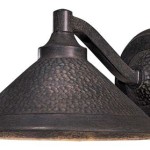
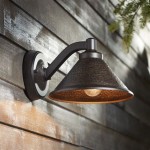
Adding A Photocell To Outdoor Light
Photocells are light-sensing devices that automatically turn lights on or off depending on the ambient light levels. They are a convenient way to save energy and make your outdoor lighting more efficient. By ensuring your landscape lights turn on at dusk and switch off at dawn, you'll be doing your part to conserve electricity and save on your utility bills as well.
Installing photocells on outdoor lights is a relatively simple project that can be completed in a few minutes. Here are the steps involved:
1. Gather the necessary materials:
- Photocell - Drill - Screwdriver - Wire cutter - Electrical tape2. Determine the location for the photocell:
- Choose a location about 5-6 feet above the ground. - Make sure the location is not obstructed by trees or other objects.3. Mount the photocell:
- Use the screws provided with the photocell to mount it to the wall or other surface. - Tighten the screws until the photocell is secure.4. Wire the photocell:
- Connect the black wire from the photocell to the black wire of the light fixture. - Connect the white wire from the photocell to the white wire of the light fixture. - Use wire caps to secure the connections.5. Turn on the power:
- Turn on the circuit breaker or switch that controls the light fixture. - The light fixture should now turn on automatically when it gets dark and turn off when it gets light.Here are some additional tips for adding a photocell to your outdoor light:
Use a quality photocell. Look for a photocell that is made from durable materials and has a long warranty. - Make sure the photocell is compatible with your light fixture. Ensure the photocell has the correct voltage and wattage rating. - Position the photocell carefully. Choose a location that is not obstructed by trees or other objects and is not facing a light source that could interfere with its operation. - Wire the photocell correctly. Be sure to connect the black wire from the photocell to the black wire of the light fixture and the white wire from the photocell to the white wire of the light fixture. - Secure the connections properly. Use wire nuts or electrical tape to secure the connections so they are not exposed to the elements.
By following these tips, you can ensure that your photocell will work properly and provide you with years of trouble-free service.

How To Add A Light Sensor Outdoor Lanterns The Navage Patch

Electrical Wiring From A Photocell To An Outdoor Led Floodlight Or Reflector 110v Devices

How To Install And Troubleshoot Photo Eye

Hardwire Post Eye Light Control With Photocell Automatic Sensor Switch Ledwholers

How To Add A Light Sensor Outdoor Lanterns The Navage Patch

Steps To Follow Add Photocell In Outdoor Lights Ledmyplace

Dusk To Dawn Photocell Switch Installation

How To Wire A Photocell Multiple Lights

Sitka Add In Outdoor Photocell Sensor For Garden Light Kits Black Litecraft

Install The Photocell Sensor
Related Posts