Outdoor Light Fixture Wiring Diagram: Understanding the Basics
Outdoor light fixtures are essential for enhancing both the aesthetics and security of any property. Whether you're illuminating a pathway, accentuating a garden feature, or providing safety lighting, understanding the wiring diagram for your outdoor light fixture is crucial for successful installation and maintenance. This guide provides an outline of the fundamental components and connections involved in an outdoor light fixture wiring diagram.
Essential Components of an Outdoor Light Fixture Wiring Diagram
An outdoor light fixture wiring diagram typically includes several essential components, each playing a crucial role in the circuit's functionality. Understanding these components is essential for interpreting the diagram and performing the necessary tasks.
- Power Source: The power source for the outdoor light fixture could be a standard household circuit, a dedicated circuit, or a low-voltage system. This source provides the electrical energy needed for the fixture to operate.
- Circuit Breaker: A circuit breaker serves as a safety device, protecting the circuit from overloads or short circuits. It automatically disconnects the power supply in case of such events, preventing potential damage.
- Wire: Wires carry the electrical current from the power source to the light fixture and back. Different types of wires are used depending on the size of the circuit and environmental conditions. For outdoor applications, weatherproof wire, often referred to as "THHN" wire, is typically employed.
- Junction Box: A junction box acts as a central point where wires from different components are connected. It keeps the wiring organized and provides a secure enclosure for the connections, protecting them from the elements.
- Switch: A switch controls the flow of electricity to the light fixture. It allows you to turn the light fixture on and off as needed. Switches can be manually operated or automated, such as motion sensor switches.
- Light Fixture: The light fixture itself houses the bulbs and provides the desired illumination. It often includes a housing, socket, and mounting components.
Interpreting the Wiring Diagram
The wiring diagram for an outdoor light fixture is a visual representation of the electrical connections within the circuit. It uses symbols to indicate the different components and their respective connections. The diagram simplifies the wiring layout, making it easier to understand and troubleshoot issues. Here's a breakdown of some common symbols used in wiring diagrams:
- Line Wire: Represented by a solid line, this wire carries the "hot" or live power from the power source to the light fixture.
- Neutral Wire: Denoted by a dashed line, this wire carries the "neutral" current back to the power source, completing the circuit.
- Ground Wire: Shown as a dashed line with a diagonal arrow, this wire provides a safe path for electricity to dissipate in case of a fault.
- Circuit Breaker: Typically depicted as a rectangular box with a switch symbol inside.
- Junction Box: Usually represented as a circle or cube with wires radiating out from it.
- Switch: Often represented by a rectangle or square with lines indicating the terminals for the incoming and outgoing wires.
- Light Fixture: Typically shown as a simple outline with a socket symbol inside.
Understanding Wire Color Codes
Wire color codes play a vital role in identifying the function of each wire in the circuit. Understanding these color codes is essential for safe and accurate wiring. Commonly used wire colors for outdoor light fixtures include:
- Black Wire: Usually represents the hot wire, carrying the power from the circuit breaker to the light fixture.
- White Wire: Typically functions as the neutral wire, completing the circuit by carrying current back to the power source.
- Green or Bare Wire: Denotes the ground wire, providing a safe path for electricity to dissipate in case of a fault.
While these are the most common color codes, it's crucial to always verify the wiring diagram for your specific light fixture to ensure accurate identification of the wires.

Wiring Installation Coastal Source

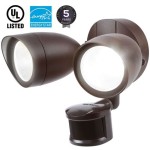
Zenith Motion Sensor Wiring Diagram Outside Lights To Handyman Wire Home Electrical

Diagrams Digramssample Diagramimages Wiringdiagramsample Wiringdiagram Check More At H Led Outdoor Lighting Security Lights Light Fixtures

How To Install Low Voltage Outdoor Deck Lighting

How To Install Low Voltage Outdoor Landscape Lighting The Garden Glove

Installation Help For Outdoor Lighting

How To Wire Outdoor Low Voltage Lighting Part 2

How To Wire Outdoor Low Voltage Lighting Part 3

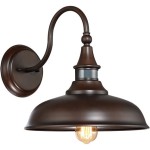
How To Install A Light Fixture Home Electrical Wiring Switch Diy

12v Outdoor Lighting Wiring Diagram Diynot Forums
Related Posts