Essential Aspects of Low Voltage Outdoor Lighting Wiring Guide
Understanding the essential aspects of low voltage outdoor lighting wiring is crucial for ensuring the safety and longevity of your outdoor lighting system. By adhering to proper wiring techniques, you can avoid potential hazards, enhance the functionality of your lighting, and maintain a visually appealing outdoor space. This article will delve into the key considerations related to low voltage outdoor lighting wiring, providing a comprehensive guide to help you navigate the installation and maintenance process.
1. Safety Considerations: Safety is paramount when working with electricity, and this extends to outdoor lighting wiring. Ensure that all wiring is protected from moisture and elements by using weatherproof fixtures and connections. Grounding is essential to prevent electrical shock, so connect all metal components to a proper grounding rod.
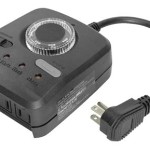
2. Transformer Selection: The transformer is the heart of your low voltage lighting system, converting higher voltage electricity to the lower voltage required by your lights. Select a transformer with sufficient wattage to power all connected lights and consider future expansion. Place the transformer in a dry, well-ventilated location to prevent overheating.
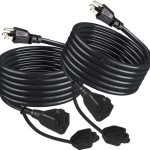
3. Wire Gauge and Type: The gauge of wire used affects its current-carrying capacity. For low voltage outdoor lighting, 12-gauge or 14-gauge wire is typically used. Use direct burial wire designed for outdoor use to withstand moisture and underground conditions.
4. Proper Wiring Techniques: Connect wires securely using twist-on wire connectors or waterproof crimp connectors. Make sure all connections are tight and insulated with electrical tape. Avoid overloading circuits by grouping lights on separate circuits if necessary.
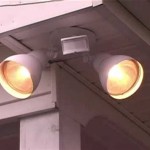
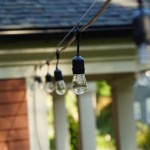
5. Lighting Layout and Placement: Plan the placement of your lights strategically to achieve the desired lighting effect. Consider the purpose of each light, whether it's for safety, security, or ambiance. Space lights evenly and avoid creating dark spots.
6. Maintenance and Troubleshooting: Regularly inspect your lighting system for any loose connections, damaged wires, or malfunctioning lights. Clean fixtures and bulbs as needed to maintain optimum performance. Troubleshooting common issues, such as flickering lights or no power, can often be resolved by checking connections and replacing bulbs.

How To Install Low Voltage Outdoor Landscape Lighting The Garden Glove

Wiring Installation Coastal Source

How To Install Low Voltage Outdoor Deck Lighting

What Size Landscape Lighting Transformer To Use Power Your Design Garden Light Led

Px Running Cable To Lighting Fixtures Fx Luminaire

What Size Landscape Lighting Transformer To Use Power Your Design Garden Light Led

Outdoor Low Voltage Lighting Diy Family Handyman

Just A Flip And Relay On Comes The Light Low Voltage Lighting Control Systems Ncw Home Inspections Llc

Replacing Landscape Lighting Quick Connectors Porch Daydreamer

How To Install Low Voltage Outdoor Deck Lighting Diy Plans
Related Posts