How to Run Electrical for Outdoor Lighting
Outdoor lighting can add beauty, safety, and security to your property. But before you start installing lights, you need to run electrical wiring to power them. Here's a step-by-step guide on how to run electrical for outdoor lighting:
Step 1: Plan Your Lighting System
The first step is to plan your lighting system. Decide where you want to place your lights, and what type of lights you want to use. You'll also need to determine the voltage and amperage of your lights, and the wire gauge you'll need to use.
Step 2: Get a Permit
In most cases, you'll need to get a permit from your local building department before you start running electrical wiring. The permit will ensure that your work meets all the local codes and regulations.
Step 3: Gather Your Materials
Once you have a permit, you'll need to gather your materials. You'll need electrical wire, conduit, connectors, and a voltage tester. You may also need a trenching tool, if you're burying the wire underground.
Step 4: Run the Wire
Now it's time to run the wire. If you're burying the wire underground, dig a trench that is at least 18 inches deep. Place the wire in the trench and cover it with dirt.
If you're running the wire above ground, use conduit to protect it from damage. Attach the conduit to the side of your house or other structure with straps.
Step 5: Connect the Lights
Once the wire is in place, you can connect the lights. Follow the manufacturer's instructions for connecting the lights to the wire.
Step 6: Test the Lights
Once the lights are connected, test them to make sure they're working properly. Use a voltage tester to check the voltage at the lights.
Step 7: Enjoy Your New Lighting
Now that your outdoor lighting is installed, you can enjoy the benefits of added beauty, safety, and security. Outdoor lighting can make your property more inviting and make it easier to navigate at night.
Tips for Running Electrical for Outdoor Lighting
- Use a voltage tester to check the voltage at the lights before you start working.
- Make sure that the wire you're using is the correct gauge for the voltage and amperage of your lights.
- If you're burying the wire underground, dig a trench that is at least 18 inches deep.
- Use conduit to protect the wire from damage if you're running it above ground.
- Follow the manufacturer's instructions for connecting the lights to the wire.
- Test the lights to make sure they're working properly before you enjoy your new lighting.

How To Install A Yard Light Post Electrical Projects Home Wiring Lights

Outdoor Low Voltage Lighting Diy Family Handyman

How To Install Outdoor Lighting And Solar Lights Garden

How To Install Outdoor Lighting And Home Electrical Wiring Diy

How To Install Low Voltage Outdoor Landscape Lighting The Garden Glove

Outdoor Electrical Wiring And Landscape Lighting

How To Install Outdoor Lighting And Diy Family Handyman

Run An Underground Electrical Line Into The Garden To Power Outdoor Light Or A Pond Pump Here S Quickest And House Wiring Electricity

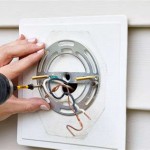
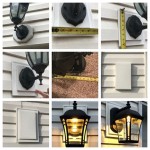
How To Install An Exterior Electrical Box For A Light Fixture On The Wood Siding

The Easiest Way To Install Low Voltage Landscape Lighting Abby Organizes
Related Posts
